Creating a blog was out of the question for a long time for me, as measuring everything in the kitchen was like biting into an eggshell. I enjoy cooking and don’t want to waste even a slightest bit of enjoyment in that small world of mine. But little did I know that everything will change, when my husband came home with the Oscar nominated film ‘Julie and Julia’( a real life story) where Julie Powell (part played by Amy Adams) challenged herself to make all the 524 recipes from Julia Child's cook book ‘Mastering the Art of French Cooking’ and blogging all her experiences (The Julie/Julia Project). It was an inspiring movie. A few days later when we were discussing this casually with a friend of ours over tea…everything changed dramatically…..” How about you making at least half of it in one year? Not French but your own. 262 recipes that will inspire others and present it as a blog?” For a minute my mind traveled faster than light… With an experience as a helper in my mother in laws kitchen for 6 years followed by a three year everyday struggle to satisfy the palate of my foodie husband, if I cannot do it then why should I cook? But on the other side with an experience in English literature extending no more than expanding outline stories in English grammar class when I was 18 and two small kids that come in handy at times, will a commitment for the next one year work? Anyway my ‘cook's ego’ didn’t allow me to say no...

So my friends …here I am opening my recipe book, trying to perfect and present 262 recipes in the coming 365 days….A Challenge that will of course tastes good. Come.. Have a walk with me along my journey.. Cheering and inspiring….Forgiving and tolerating…Testing and tasting….for ‘A Tasty Challenge’

Search This Blog

Thursday, December 30, 2010

Vettu / Iratta/ Teashop/ Chayakada Cake

Recipe No: 157
This is a mildly sweet fried Cake that is available in most of the roadside Teashops in Kerala. When I visit my house in Pathanamthitta, I still buy it at times to refresh that nostalgic taste. It is crispy on the outside and soft on the inside with a predominant Egg taste and a slight hint of Cardamom.
Ingredients                                        Make 6 big ones
  • All Purpose Flour/ Maida………1 ½ Cup
  • Baking Soda………………………...1/4 Teaspoon
  • Cardamom Powder…………….…1/8 Teaspoon
  • Sugar………………………..…………1/4 Cup
  • Salt………………………….………….1/8 Teaspoon
  • Egg…………………………….……….2 Large
  • Oil for deep frying
Method of Preparation
  1. Sift together Flour, Baking Soda, Salt, Sugar and Cardamom Powder well.
  2. Beat the eggs really well and use the beaten Egg to make a dough out of the Flour mixture. Ideally the Eggs will be enough to make soft and smooth dough. But if in case the dough is not soft, sprinkle some Water. Let it sit for 10 minutes, covered.
  3. Heat at least two inches of Oil on medium heat.
  4. Divide the dough into 6 equal parts.
  5. Make a rough square with each portion of dough.
  6. Before dropping the dough in the Oil, make a slit along the middle.
  7. Let it fry on a medium heat till it attains a uniform golden brown color. Do turn  it over in between.
  8. Strain the excess Oil on a paper towel and serve hot with a cup of Tea.
Notes:
  • Don’t use more Baking Soda than what is mentioned in the recipe.
  • The dough will increase its size at least by three times in the Oil. Keep this in mind while you drop the dough pieces in the Oil. Don’t overcrowd and leave space for expansion.
  • It will take around 8-10 minutes for a batch to fry. So make the dough pieces small if you want to fry it faster. Don't try to rush the frying process by increasing the heat as it will result in a dark exterior and a raw interior.


Make it, enjoy the deliciousness and 
serve it to your family with love…

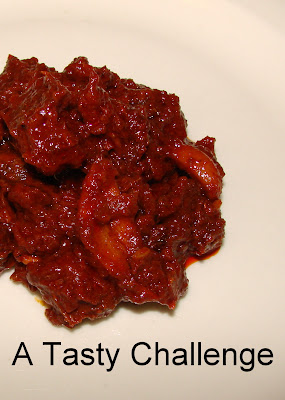
Prawn/ Shrimp Curry (Konchu Kudam puli ittu Curry Vachathu)

Recipe No: 156
Back when I was small, we used to have a usual fish monger lady, whom we used to call ‘Mariya Chedathi’. Her voice was very characteristic of her, as it was heard at least three houses down street if she spoke softly!!! . Even if she had that voice she used to deliver some of the best fishes and sometimes used to clean it for my mother and Prawns were one among them. Even though I was very small at that time to appreciate the goodness of the ingredients and the awesomeness of my Mother’s preparations, this one Curry always lingers around my tongue… especially because she used to make this even now as it is one of my Father’s favorites. This is how she used to make...

Ingredients                             Serves 4
  • Prawn shelled and cleaned….2 Cups
  • Shallots cut into big pieces….1 Cup
  • Ginger Chopped fine………….1 Tablespoon
  • Coconut pieces……………..…..1/4 cup
  • Curry Leaves…………………….2 Sprigs
  • Kokum/ Kudampuli…………..2 big pieces
  • Coconut Oil………………….…..1 Tablespoon
To Grind
  • Chilly Powder……………………3/4 – 1 Teaspoon
  • Coriander Powder……………..1 ¼ Teaspoons
  • Turmeric Powder…………..….1/2 Teaspoon
  • Garam Masala Powder………3/4 Teaspoon
  • Garlic....................................1 big clove
  • Shallots………………..………….2
  • Salt……………………...………….as per needed
Method of Preparation
  1. Grind all the ingredients in the ‘to grind’ section into a smooth paste.
  2. Mix Prawns, Shallots, Ginger, Coconut Pieces, Kokum, one sprig of Curry Leaf and the ground paste along with ¾ cup Water in a ‘Chatti’ (an earthen cooking vessel) and cook it on high heat till it boils nicely.
  3. Once boiled, lower the heat to medium and cook for 15 minutes or till the prawns are cooked well. Add more Salt if needed.
  4. Once cooked, drizzle the Coconut Oil and some torn Curry Leaves on top; close the pan and let it sit for at least 20 minutes before serving.
Notes:
  • One thing that needs special attention is the freshness of the Prawn. You can make this with raw frozen cleaned Shrimp, but it tends to become a bit hard while cooking. Instead, if you use head on Shrimp (even if it is previously frozen) the Prawns in the prepared Curry will be very soft (A secret told to me by a friend of mine, but later felt it myself). So whenever I buy head on Shrimp, I like to make this.
  • Don't slice the Shallots thin. Cut them into two if small and  quarter, if big.
  • This Curry is best when it is made with homemade Garam Masala. (Get the recipe here)
  • Don't try to avoid 'Kokum'  as it gives the characteristic taste and also will help balance out the natural sweetness of the Prawns. These are available most of the Indian stores.
  • Don’t forget to sprinkle Coconut Oil and Curry Leaves on top. It will give an enticing aroma to the Curry.
  • Leave the Curry covered in the end for some time. The older generation calls it ‘Parthrapakam’ which means the time for the dish to reach perfection in its own cooking vessel.


    Make it, enjoy the deliciousness and 
    serve it to your family with love….

    Wednesday, December 29, 2010

    Jam Roll

    Recipe No: 155
    This is another one of my childhood bakery favorites. It is very easy to make yet very delicious.
    Ingredients                                        Makes around 16 pieces
    • Egg…………………………..3 Large
    • Sugar……………………….3/4 Cup
    • Vanilla Extract…………..1 Teaspoon
    • Flour………………………..1/2 Cup + 2 Tablespoons
    • Baking Powder…………..1/4 Teaspoon
    • Jam…………………..........1/2 Cup (I used homemade Strawberry Preserve)
    • Powdered Sugar………...for decoration
    Method of Preparation
    1. Preheat oven to 350˚F/ 180˚C.
    2. Sift together Flour and Baking Powder and keep it aside till ready to be used.
    3. Whip together Egg, Sugar and Vanilla Essence till it attains a pale yellow color or until it is doubled in volume.
    4. Fold in the Flour mixture gently without deflating much of the aeration.
    5. Pour it into a greased Parchment/ Butter paper lined 11x15 inch baking tray (even the top with a spatula) and bake in the middle of the oven for 10-12 minutes or till an inserted toothpick comes out clean.
    6. While the cake is baking lay a clean kitchen towel on a flat surface and dust powdered sugar evenly.  
    7. Once the cake is done, loosen the sides of the Cake with a sharp knife and invert it onto the powdered kitchen towel.
    8. While the Cake is still hot, start rolling it with the towel along the shorter side of the Cake (so that the whole length is available for rolling). There should be a layer of Kitchen towel in between the Cake layers, otherwise the layers may stick together (especially as it is hot).
    9. Once the whole Cake is rolled, keep it like that till it is completely cooled.
    10. When completely cooled, unroll it and spread a thin layer of Jam on the  Cake and roll it back carefully. This time avoid the kitchen towel.
    11. Decorate the top with powdered sugar; cut into ½ inch thick pieces and serve.
    Notes:
    • It is better and easier if you use a hand or stand mixer to whip the Egg. If you are using a hand mixer then place the bowl with Egg on top of simmering water. (Don’t let the bowl with the Egg touch the simmering Water) This will make whipping faster.
    • When you pour this amount of batter to such a big tray, you might feel that the batter is less. But believe me it will rise and will give a big Cake so that you can make a few spirals. If you are using a small tray you will be able to get only a lesser number of spirals and in that case you may not need so much Jam.
    • If you are using a smaller tray the cake will come out thick and in that case the baking time may increase. Remember a thin Cake is easier to roll than a thick Cake.
    • Please make sure to dust powdered Sugar on to the kitchen towel before inverting the Cake or it may stick to the towel.
    • Don't spread the Jam while the Cake is hot because  the heat from the Cake will make the Jam runny which in turn  makes the rolls soggy.
    • Rolling the Cake in the kitchen towel while hot will allow the flexibility. If you try to roll a cold Cake it will break. So it is very essential to get the Cake cooled in a rolled condition.


    Make it, enjoy the deliciousness and 
    serve it to your family with love…

    Vazhuthananga Theeyal/ Brinjal/ Egg Plant in Roasted Coconut Gravy

    Recipe No: 154
    This recipe is a bit on the easy side to make. Whole Dry Red Chilly and Whole Coriander Seeds are traditional for Theeyal but in foreign  places many of us may not be having these whole spices. So making it with the spice powders will make it easy. Another difference in this recipe is that I made it with dry desiccated Coconut which is available in most of the stores. It will attain the characteristic brown color much faster than that of fresh or frozen  grated Coconut (you can use this same recipe for fresh Coconut too) which will be a great help for those people who have only very less time for cooking. So enjoy…
    Ingredients                                       Serves 6
    • Dry desiccated Coconut…..1/2 Cup(If using fresh or frozen grated Coconut, use ¾ Cup)
    • Red Chilly Powder……….…1 Teaspoon
    • Coriander Powder……….…1 ½ Teaspoons
    • Brinjal/ Egg plant sliced.…1 Cup (Slice into long, thin pieces)
    • Shallots sliced………….……1/2 Cup
    • Indian Green Chilly……….2 Sliced
    • Turmeric Powder…………..1/4 Teaspoon
    • Water……………………….….1/2 Cup
    • Salt………………………………as needed
    • Tamarind……………………...one small piece(soak and squeeze out the pulp in hot water)
    For Seasoning
    • Coconut Oil………………….1 Tablespoon
    • Mustard Seeds……………..1/2 Teaspoon
    • Dry Red Chilly……………..2 (tear into two)
    • Shallots sliced thin……….1
    • Curry Leaves……………….1 Sprig
    Method of Preparation
    1. In a dry pan on medium heat, roast the grated Coconut until it attains a brown color, stirring constantly to avoid burning.
    2. Once it attains the color, off the heat; add Red Chilly Powder and Coriander Powder and stir for a minute. (This will slightly roast the dry spices too and stirring will prevent it from burning)
    3. Once this roasted mixture is slightly cooled, grind it into a smooth paste using minimum amount of water and keep it aside till ready to be used.
    4. In a ‘Chatti’ (an earthen cooking vessel) or a pan add Brinjal, Shallots, Green Chilly, Turmeric Powder, Salt and ½ cup water and cook on medium heat for 5 minutes.
    5. Add the Roasted Coconut paste, close the pan and cook on low flame till it attains the desired thickness and Oil floats on top. (This Oil is from the roasted Coconut) Adjust the Salt.
    6. Add the Tamarind Water and mix well. (I will mix little by little, mixing in between until a desired taste is attained.) Once boiled switch off the heat, close the pan and let it sit.
    7. In another pan, heat Coconut Oil and splutter the Mustard Seeds.
    8. Add Dry Red Chilly, Shallots and Curry Leaves and fry till the Shallots are golden brown in color.
    9. Add this to the prepared Theeyal, mix well and serve hot with Rice.
    Notes:
    • After slicing the Brinjal wash it under running Water in a Colander (The vessel with holes in the bottom and on the sides that is used to strain cooked rice) squeezing. This will release all the seeds which will escape through the holes, leaving only the Brinjal pieces inside.


      Make it, enjoy the deliciousness 
      and serve it to your family with love…

      Tuesday, December 28, 2010

      Chicken Wings Indian Style

      Recipe No: 153
      Wings are one of our family favorites. I was thinking of making it with an Indian twist for some time and this is the result. I should say this has a Manjurian flair to it which will be very appealing to an Indian palate.

      A whole Chicken Wing has three parts a Drummette, the part that attaches the wing to the shoulder (the part with most meat in a wing) a Wingette, the part between Drummette and the tip (part which have two bones) and the tip which is not so good for eating but very good for making Chicken stock. The Drummette and Wingette can be separated easily by cutting through the attachment and these separated parts are what we need in this recipe. (Reserve the tips for making Stock)
      Ingredients                                  Serves 3
      • Wing pieces………………………..12 (Drummetts and Wingetts separated)
      • Oil for deep frying
      To marinate
      • All Purpose Flour/ Maida……..1 Teaspoon
      • Corn Flour……………………….…1Teaspoon
      • Rice flour……………………………1 Teaspoon
      • Ginger Garlic Paste………………1/2 Teaspoon
      • Salt………………………………..….3/4 teaspoon
      • Soy Sauce……………………………1 Teaspoon
      • Red Chilly Powder………………..1/2 Teaspoon
      • Egg…………………………………....1 beaten
      To Make the Sauce
      • Oil………………………………………2 Tablespoons
      • Garlic chopped……………………..2 Tablespoons
      • Spring Onion Chopped……..…..2 (separate Whites and Greens)
      • Sambal Oelek…………………….….1/2 Teaspoon (If not available use Red Chilly Flakes or crushed Red Chilly)
      • Red Chilly Garlic Sauce…………1 Tablespoon
      • Soy sauce……………………….…..1 ½ Teaspoons
      • Tomato Ketchup…………….……1 Tablespoon (Can substitute with Tomato Sauce)
      • Vinegar……………………….……..1 Teaspoon
      • Sugar………………………….………1/2 Teaspoon
      • Coriander Leaves Chopped.…..2 Tablespoons
      • Corn Starch…………………..…….3/4 Teaspoon diluted in ¼ Cup Water
      • Salt as needed
      Method of Preparation
      1. Clean the Chicken Wings and dry it thoroughly.
      2. Make a marinade with all the ingredients mentioned in the ‘to marinate’ section and marinate the Wings; keep it aside for 20 minutes.
      3. Heat at least 2 inches of Oil in a pan on medium high heat and deep fry the Wings until crispy.
      4. Drain the excess Oil on a paper towel.
      5. In another pan heat 2 tablespoons of Oil on medium high heat and saute the Garlic and Spring Onion Whites for about 40 seconds. Take care not to burn it.
      6. Add Sambal Oelek and saute for 30 seconds.
      7. Add Red Chilly Garlic Sauce, Soy Sauce, Ketch up, Vinegar, and Sugar; mix well. Check the Salt content and add if more needed.
      8. Add the fried Chicken Wings and mix well followed by Coriander leaves and Spring Onion Greens.
      9. Once mixed well, drizzle the Corn Starch Water and combine as fast as possible.
      10. Once coated well, move it to a serving dish and serve hot.
      Notes:
      •  If you don't want to deep fry the Wings, do broil it in the Oven.
      • While making the sauce, add Salt only after adding all the sauces as most of them contains Salt.
      • Do keep everything ready before you start making the sauce as the whole process is very fast.
      • Sambal Oelek is Red Chilly Paste in Vinegar and is found in the International section of all grocery stores.
      • Red Chilly Garlic Sauce is available in most of the Indian stores.


      Make it, enjoy the deliciousness and 
      serve it to your family with love…

      Bun

      Recipe No: 152
      This is a variation of the basic White Bread that I posted a few days earlier. There are a few differences in the amount of ingredients (Sugar and Yeast) and a small difference in procedure. There is a second kneading involved after the first rise. This will make the Buns very light and airy when compared to the Bread. I should say that the taste of this will came very near to the Buns that are available in Kerala Bakeries.
      Ingredients                                          Makes 8 big or 12 medium Buns
      • Milk……………………………...................1/4 Cup
      • Sugar…………………………....................4 Tablespoons
      • Salt…………………………….....................1 Teaspoon
      • Butter or Shortening…........................1 ½ Tablespoons
      • Active Dry Yeast…………......................3 Teaspoons
      • Luke warm Water……….......................3/4 Cup
      • Maida or All Purpose or Bread Flour…2 ½ to 3 Cups
      • Egg Wash (Beat 1 Egg with a tablespoon of Water)
      Method of Preparation
      1. Heat Milk, Salt, Sugar and Butter in a saucepan over medium heat until the sugar is melted. Let it cool to lukewarm.
      2. Dissolve Yeast in Warm Water in a big Bowl. (Bowl of a stand mixer if you have one)
      3. Add the Milk mixture and 2 Cups of Flour and mix really well for a minute or till everything is combined. (Use a dough hook if using a Stand Mixer)
      4. Add ½ to 1 Cup more of Flour until the dough forms a soft and smooth ball. (In a stand mixer the dough should leave the sides of the Bowl.) Use only just enough Flour to make a manageable (can be knead without much sticking) dough.
      5. Dump it on to a floured board and knead for 8 to 12 minutes. (If you are using a stand mixer let it knead on speed 2 for 3- 5 minutes) The resulting dough should be smooth and elastic.
      6. Place the dough in a greased bowl turning it once to grease the top.
      7. Cover it with a damp towel and let it rise for about 1 hour or till it is doubled in bulk.
      8. Punch it down and knead it again for about 5 minutes. (If using a stand mixer knead on speed 2 for 2 minutes)
      9. Divide it into 8 equal sized portions. (If you want smaller buns make it 12.)
      10. Shape each portion into a smooth ball. (Pull the top of the ball and tuck it under and roll it over a board to make it smooth.)
      11. Place it 2 inches apart on a baking tray; cover with a damp towel and let it rise for 20 minutes. (It will start to touch each other at this stage)
      12. Preheat the Oven at 375˚F/ 190.5˚C.
      13. Brush the top of the raised dough with the Egg wash and bake for 13-15 minutes or till the top of the Buns are golden brown in color or the internal temperature attains 165˚F/ 74˚C.
      14. Serve it warm or at room temperature.
      Notes:
      • Bread Flour and All Purpose Flour (which is same as that of Maida) are different. Bread Flour contains a higher amount protein that will in turn develop a higher amount of Gluten while kneading. This Gluten is responsible for the elasticity of Breads. Thus Bread flour will give a more elastic and soft Bread than that of All Purpose Flour. But you can substitute one with the other using the same measurements, even though, the results may vary slightly. As All Purpose Flour is widely available, I tend to use it more and the results are perfectly satisfactory.
      • Heating milk and then cooling it seems like a step that can be avoided but it is very crucial in determining the texture of the Bread. So please don't avoid that step. 
      • The doubling time for the dough will depend on the power of the Yeast and the temperature of the surroundings. So please wait till the dough doubles in your cooking conditions.As Buns got most Yeast (and Sugar, the food in which Yeast grows) this will double faster than Bread dough and  so one can make Buns faster than Breads.
      • I used active dried Yeast in this recipe. Don't let it rise for more time as mentioned in the recipe, for if you do, that will reduce the sweetness of the Buns and increase the sourness due to the overactive Yeast. So keep it only till it is doubled.
      • The temperature of the Water to which we put the Yeast should be lukewarm. That temperature will activate the Yeast, but if the temperature of the Water is high then it may kill the yeast. So after dissolving the Yeast in Water give it a few minutes to become active, that is shown by the bubbling of the dissolved Water. If it doesn't show a bubbling action either you have killed the Yeast or the Yeast is of poor quality (happens when it is very old). In both cases, start over again with fresh Yeast. 
      • A second kneading is very important in the case of Buns because that gives a very light and airy texture to the Buns (at least in my experience).
      • Shortening refers to any solid fats like Dalda or Margarine. In US the commonly used Shortening is Crisco. Butter usually have around 80% fat (the rest Water, Milk solids etc:) while most of the Shortenings are 100% fat.
      • I like these Buns when it touches each other because, personally, I know whether it is cooked well inside by the way it feels when I pull it apart to separate (a procedure that I borrowed from the making of Dinner Rolls).


        Make it, enjoy the deliciousness and 
        serve it to your family with love…

        Monday, December 27, 2010

        Masala Cheese Crackers

        Recipe No: 151
        Back in Kerala, the Masala biscuits are easily available in most of the stores. But after coming to US, it became hard to find those yummy ones. So I decided to give it a try and here is my take on those delicious Crackers. I am using a bit of Sugar for a hint of sweetness, but if you want to avoid that just leave the Sugar out (I kinda like that slight sweetness).
        Ingredients                                      Makes around 3 dozen
        • Butter…………………………...1/2 Cup (1 stick)
        • Sugar…………………………....3 Tablespoons
        • Egg……………………………….1
        • All Purpose Flour/Maida…1 Cup
        • Baking Powder………………1/2 Teaspoon
        • Red Chilly Powder………….1 ½ Teaspoon (I used mildly hot one)
        • Cumin Powder………………1/2 Teaspoon
        • Garam Masala Powder…...1/2 Teaspoon
        • Salt………………………….…..1/2 Teaspoon
        • Sesame Seeds………………..1 Teaspoon
        • Grated Cheese…………..….3/4 Cup (I used grated Parmesan.But Amul Cheese will work)
        Method of Preparation
        1. Preheat the oven to 325˚F/ 163˚C.
        2. Sift together Flour, Salt, Baking Powder, Red Chilly Powder, Cumin Powder and Garam Masala Powder really good. Mix in the Sesame Seeds, stir and keep it aside till ready to be used.
        3. Mix together, Butter and Sugar till light and fluffy.
        4. Stir in the Egg to the Butter mixture and beat everything until combined well.
        5. When fluffy, add the Flour mixture and mix well.
        6. Fold in the grated Cheese and make it into soft and smooth dough.
        7. Dump this onto a floured board (or any work surface) and divide it into two portions.
        8. Roll out each of the portions into 1/8 of an inch thick rounds.
        9. Cut out small rounds using a cookie cutter of 2 ½ inch diameter and place on a baking tray half an inch apart.
        10. Prick the top of the cut out crackers here and there using a fork and bake in the middle of the oven for 12-13 minutes. Roll out the dough scraps to make more crackers.
        11. Once out of the oven let it sit on the baking sheet for 2 minutes and then transfer it to a cooling rack.
        12. Serve this at room temperature with a cup of Tea or with Cheese.
        Notes:
        • Don’t use any melting kind of Cheese; use only some crumbly non melting kind of cheese like Parmesan. In India the common type that can be used is the Amul Cheese that is available in tins.
        • As these are crackers, you have to roll it out pretty thin (1/8 th of an inch or slightly less than that).
        • If the dough is sticking to the fork while pricking, do dip the tip of the fork in Flour now and then.
        • These Crackers won't spread much. Pricking the top of the Crackers will prevent it from puffing, which is essential for Crackers.
        • Once out of the Oven you should leave it on the hot baking tray itself for 2 minutes. This will finish cooking the crackers and will help them crisp up.
        • Cooling rack (being thin metal wires connected at a distance) is good for cooling cookies as it will not make the bottom soggy by trapping the vapor.


        Make it, enjoy the deliciousness and 
        serve it to your family with love…

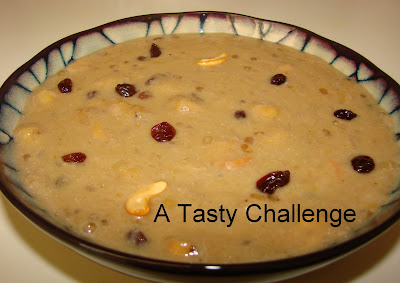
        Pazham(Banana) Pradhaman (Ripe Banana-Jaggery Dessert)

        Recipe No: 150
        Some days before when I posted Banana Halwa, I mentioned about a friend who, at times, calls me and to ask about what to do with the overripe Bananas.This is one other  dish that I make to save them. Once you try this, I am sure that you will buy extra Bananas just to make this!!!!
        Ingredients                       Serves 6
        • Ripe Banana chopped…….....3 cups (heaped)
        • Shredded Jaggery………….....1 ½ cups loosely packed (small pieces will do, but don't pack)
        • Tapioca Pearls/ Chavvari…..2 tablespoons
        • Ghee……………………………….  1 ½ tablespoons
        • Cashew nuts and Raisins…..2 tablespoons each
        • Milk…………………………….....1 ¼- 1 ½ cups (Use according to the thickness you want)
        • Cardamom Powder…………..3/4 teaspoon (freshly made is better)
        • Dry Ginger Powder…………1/3-1/2 teaspoon (Chukkupodi. Add 1/4 teaspoon and then increase if needed depending on your taste.)
        Method of Preparation
        1. Heat Jaggery with ½ cup Water till it is melted. Strain and keep it aside.
        2. Heat Tapioca pearls together with ½ cup Water till boiled and keep it aside covered, till ready to be used.
        3. Melt Ghee on medium high heat and fry Cashew nuts till it starts to brown along the edges and add the Raisins. Fry  them together till the Raisins plump up. Remove them from the Ghee and keep them aside till ready to be used.
        4. To the remaining Ghee, add cubed Bananas and cook for 3 minutes on high heat stirring now and then. By now, some of the Banana pieces will be mashed and some remain as pieces and a lot of liquid will be oozed out.
        5. Add the strained Jaggery, Tapioca Pearls along with the cooking liquid, Cashew nuts and Raisins.
        6. Lower the heat to medium  and cook for 10 minutes stirring often. By this time the liquid content will be reduced considerably.
        7. Add Milk and let it boil along the edges.
        8. Add Cardamom Powder and Dry Ginger Powder; mix well and switch off the heat.
        9. Cover the pan and let it sit for 30 minutes before serving warm or cold.
        Notes:
        • Raw Cashew nuts need some extra time to fry than Raisins, so add Raisins only a bit later. But if you are using roasted Cashews, fry both of them together.
        • After pouring the Milk don’t let it boil thoroughly as it may separate. Don’t forget to stir constantly after pouring the Milk.
        • The Bananas that are very common is US is the Robusta type Banana, which is used in this recipe too. Don't confuse it with Plantains (Ethakka).
        • I used lighter colored Jaggery and so this dish is lightly colored. But if you are using darker colored Jaggery then this dish will also become darker (I prefer the darker variety but for now I have to be satisfied with the lighter version.) 
        • The thickness of this Pradaman is good to be poured on a Banana leaf for traditional Kerala Sadhya (feast).


        Make it, enjoy the deliciousness and 
        serve it to your family with love…

        Sunday, December 26, 2010

        Russian Salad

        Recipe No: 149
        This is my version of the Russian Salad that I ate from the restaurant Oasis in Kedaram Shopping Complex in Thiruvananthapuram. The thing I love most about this salad is the presence of a fruit along with the other Vegetables, which makes it one of those dishes that have both sweet and savory elements. I had this same dish from the same restaurant with different fruits like Orange and Pineapple (only one fruit at a time), but I should say my favorite is always the one with Pineapple.
        Ingredients                                       Serves 2
        • Carrot cut into cubes……….....1/2 Cup
        • Beans cut into cubes……………1/2 Cup
        • Potato cut into cubes…………..1/2 Cup
        • Pineapple cut into cubes…..….1/3 cup
        • Hard boiled Egg…………….……1, quartered
        • Mayonnaise……………………….2 ½ Tablespoons
        • Salt and Pepper to taste
        Method of Preparation
        1. Bring Carrots, Beans and Potatoes with ¼ cup water to a boil and then lower the heat to low and let it cook. The Vegetables should be just cooked. Drain if there is excess water.
        2. Let the Vegetables cool down a bit and mix Pineapple, Mayonnaise, Salt and Pepper.
        3. Transfer it to a serving dish and arrange Egg on top.
        4. Serve warm or cold.
        Notes:
        • Don't over cook the Vegetables or it will mash while mixing.  It should be only just cooked.
        • Don’t mix Mayonnaise when the Vegetables are very hot or Mayo will lose its consistency.
        • If you are on a diet, please use low fat Mayo. (Don’t substitute Mayo with Yogurt in this recipe.)


        Make it, enjoy the deliciousness and
        serve it to your family with love…

        Thursday, December 23, 2010

        Nettoli/ Anchovy/ Smelt/Fish Pickle

        Recipe No: 148

        Asha, can I make a recipe request?
        It's for Fish Pickle. I know the regular recipe, but I'm looking for something similar to what mummy (Valsa) makes. It has a lot of gravy in it, and if I'm not wrong, she grinds garlic, ginger, tomato, and rest of the stuff to get that thick paste.  She and your MIL might have a lot of recipes in common...  Just wondering if yours is something similar?
        I've always wanted to ask her, but never happened.

        This is a mail that I received a few weeks before from a blog reader which I spied as a relative of my cousin!!! (See I am good at that too!!!) I think this Fish pickle recipe cannot get a better description than what she said. Yes… it is really against all the traditional pickling methods and all those who adore those pickles may raise their eyebrows. But we, including my 7 year old daughter simply adore my Mother In Law's pickle because it has a lot of thick gravy and simply sitting around the dining table licking it after the meal chatting, is something worth cherishing. Well it does have a drawback too…Everyone  will eat it just like other curries...and it will be finished in a jiffy. But I am very good in hiding things around my place. (and so is my husband in finding things that I hide from him!!)

        Any way let me come to my recipe; I use the same procedure as that of my Mother in Law . With Anchovies, one may think that it will be full of bones... but believe me you will never hit a bone as it is deep fried well in Oil and I should say it is different and delicious...              
        Ingredients         
        To marinate                           
        • Fish cut into small pieces…1/2 kg (I used Nettoli/ Anchovy. If they are big, cut into small pieces. Any sort of Fish cut into small pieces will work)
        • Salt………………………………....1/2 Teaspoon
        • Red Chilly Powder…………….1/2 Teaspoon
        • Turmeric Powder……………...1/2 Teaspoon
        To Saute
        • Oil…………………………………..1/2 Cup (Gingelly/ Sesame Oil/ Nallenna is used widely but I used Canola)
        • Whole Garlic………………..…..1/3-1/2 Cup (If too big slice them into two)
        • Onion chopped finely………...1/2 Cup
        • Ginger- Garlic paste…………..2 Tablespoons
        • Chopped Tomato……………….1/3 Cup (Optional)
        • Red Chilly Powder……..……3-4 Tablespoons (According to your taste, I used 4 Tablespoons of Red Chilly Powder with a less heat)
        • Cumin Powder………………....1/2 Teaspoon
        • Fenugreek Powder…………....1/3 Teaspoons (Uluva podi)
        • Vinegar…………………………….1/2 – 2/3 Cup (Adjust according to your taste)
        • Boiled Water………………….…2/3 Cup
        Method of Preparation
        1. Marinate the Fish pieces with the ingredients mentioned in the ‘to marinate’ section.
        2. Heat ½ cup of Oil in a pan and fry the Fish pieces till they are crispy. Do it in two batches.
        3. Take the Fish pieces off the Oil and keep them aside till ready to be used.
        4. To the rest of the Oil on medium heat, add the  whole Garlic cloves and fry till slightly browned. Take them aside and keep with the fried Fishes
        5. To the remaining Oil, add the chopped Onion and saute till nicely browned. (Very important…it should be really brown, but take care not to burn)
        6. Add Ginger Garlic paste and saute till the raw smell is gone.
        7. Mix in Red Chilly Powder, Cumin Powder and Fenugreek Powder and fry till the raw smell is gone.
        8. Add the chopped Tomatoes (if using) and saute till it is really mashed up and Oil starts to separate. (Very important that Oil has to separate.)
        9. Add the fried Fishes, Garlic and the Vinegar, boiled Water and Salt; mix well.
        10. Let it boil slightly. At this stage Oil will start to float on top. Off the heat and transfer it to a dry sterilized bottle.
        11. Once cooled, close it nicely and store in the refrigerator.
        Notes:
        •  If properly made by sauteing everything well (especially Onion), this pickle won’t go bad at room temperature for 2-3 weeks (if the climate is cool). But if the room temperature is high and you have to open and close the Pickle bottle often, then please do store it in the refrigerator.
        • The Pickle becomes thick when it cools down. So if you want more gravy add a bit more of Boiled Water. 
        • Use only boiled water to give as much sterilization as possible.
        • Even though this Pickle can be eaten on the day it is made, it becomes tastier as it sits.


          Make it, enjoy the deliciousness and 
          serve it to your family with love…

          Tuesday, December 21, 2010

          Milk Chocolate Cardamom Panna Cotta

          Recipe No: 147
          A few days back when I was going through my Face book updates I saw one of my friend’s comments on the 801st episode of Feeding Frenzy (NDTV Hindu), which featured a dish  ‘Milk Chocolate Cardamom Panna Cotta’. Well…. this small feature triggered my curiosity to try out how Chocolate will taste when paired with Cardamom… which led to me making the dish within 20 minutes of watching!!!
          ‘Panna Cotta’ is an Italian dessert which is usually ‘cooked Cream’. The quality of this dessert will depend entirely on the quality of the Chocolate that you are using... and I should say that the taste of Milk Chocolate with a hind of Cardamom really works well..This is the way I made it….
          Ingredients                               Makes 5 servings
          • Cream…………………………..1 Cup
          • Milk.................................1 Cup + 3 Tablespoons
          • Gelatin…………………………2 Teaspoons
          • Sugar…………………………..3-4 Tablespoons
          • Whole cardamom…………..5
          • Milk Chocolate……………...3/4 Cup (small pieces)
          Method of Preparation
          1. Dissolve Gelatin in 3 Tablespoons of cold Milk and let it sit for 5 minutes. By this time Gelatin will be soaked and plumped up.
          2. Crush the Cardamom pods really well and mix it with Cream and 1 cup of Milk. Heat it on a medium flame along with Sugar and the soaked Gelatin. Stir continuously.
          3. Once boiled, strain it to remove all the Cardamom Pods and pour the Cream mixture back in its cooking vessel. Put it on medium flame again.
          4. Mix the Chocolate and stir till it is dissolved well.
          5. Pour this in individual dishes or molds and let it chill for about 6-8 hours.
          6. If you want to serve it in a plate or take it out of the mold, dip the bottom of the dish in warm Water for 8-10 seconds, run a sharp knife along the edges and place it upside down on a serving plate.  If it is not yet coming out, use a knife to help it come out.
          7. Serve with Chocolate or Carmel sauce.
          Notes:
          • Using Milk Chocolate is not a necessity in this recipe. You can substitute that entirely with Semisweet Chocolate together with ½ teaspoon of instant Coffee Powder and ½ teaspoon of Vanilla extract.
          • Don’t add Gelatin directly to a hot liquid as it will lose its gelling property. So always soak it in cold liquid. (here cold milk).
          • The amount of Chocolate to be used depends on your taste, but make sure to increase or decrease the amount of Sugar accordingly. 
          • I don't like to serve this very cold, as the Gelatin will be very hard. If you are taking it out of the mold, that process will make it soft. But if you are serving it in the mold it self then let it sit at room temperature for some minutes till it becomes a bit soft. (Don't let it become liquid. I take it out of the fridge and microwave it for 8-10 seconds before serving.)


          Make it, enjoy the deliciousness and 
          serve it to your family with love…

          Monday, December 20, 2010

          Almond-Anise seed Biscotti

          Recipe No: 146
          Back home, most of the Bakeries have these crispy Cake like thing that are mostly kept in glass jars (I am sorry that I don't know its name, but if anyone knows, please share...) It is light yellow in color with Tutty Fruity here and there and its texture is that of a Rusk but tastes like a Cake… Now these Italian Cookies tastes exactly like those ones in glass jars.

          For a very long time I used to make Raisin Biscotti, but once I happened to taste these Almond Biscotti that was bought from Costco from a friends house. (who are by the way very crazy of these)  After tasting that, I never went back to Raisin Biscotti… now I make only these Almond-Anise Seed Biscotti… and sometimes substitute a portion of Almonds with Pistachios depending on its availability at home. (It is in one of the picture)

          ‘Biscotti’ literally translates as ‘double baked’ which is exactly what happens in the baking of these Cookies. It’s baked as big logs first and later cut into small pieces and baked for a second time. This very lightly sweet Cookie goes excellent with Tea.
          Ingredients                                  Makes around 40 cookies
          • All Purpose Flour/ Maida………….3 Cups
          • Baking Powder……………………...…1 Teaspoon
          • Salt………………………………………...1/2 Teaspoon (Avoid this if you are using Salted Butter)
          • Unsalted Butter………………………..1/2 Cup (1 Stick)
          • Sugar………………………………………1 Cup
          • Eggs…………………………………..……3
          • Vanilla Extract…………………….……1 Teaspoon
          • Dried Whole Almonds……………….1 ½ Cups (Substitute with 1 Cup Almond and ½ cup shelled Pistachios if you wish)
          • Anise Seeds……………………...………1 ¼ Tablespoons (If not available use 1 Tablespoon of Fennel Seeds)
          Method of Preparation
          1. Preheat oven to 350˚F/180˚C.
          2. Heat a pan on medium heat and dry roast (without Oil) Almonds and chop into medium sized pieces. (Don’t make it small) Keep it aside till ready to be used.
          3. Line two baking sheets with Parchment paper and apply a small coating of Butter . (or simply use a cooking spray)
          4. Sift together Flour, Baking Powder and Salt; keep it aside.
          5. Mix together Butter, Sugar and Vanilla Essence till light and fluffy.
          6. Add Eggs one by one and mix till it is combined really well.
          7. Mix in the Flour mixture until just combined.
          8. Add the chopped Almonds and Anise Seeds and mix till it is equally distributed.
          9. Divide this equally into two logs of 8-9 inches long and 2 ½ inches broad. This dough is very sticky, so dip your hands in water before using it to shape the log.
          10. Bake it in the middle of the preheated oven for 30-35 minutes or till the sides starts to brown slightly.
          11. Take it out of the oven and let it cool down a bit.
          12. Cut it into ½ inch thick pieces and arrange it in one layer on the baking sheets.
          13. Keep it again in the oven and bake for 8 minutes on each side or till it hardens slightly. (Once out of the oven it hardens a bit more.)
          14. Once cooled, store it in an air tight container and serve at room temperature with a cup of Tea.
          Notes:
          • Almonds can be used as whole, but I found that it is a bit hard to cut through the log if you are using whole Almonds, not to mention the higher chances of  the pieces crumbling when you slice the logs. So I prefer cutting the Almonds into thirds after toasting. But I don’t mind putting the Pistachios as whole since they are smaller in size.
          • Anise Seeds looks almost the same as that of Fennel seeds (both belong to the same family Apiaceae) but slightly smaller in size. But the taste to me is almost the same. I have made these Biscotti with both Anise Seeds and Fennel Seeds and it needs an incredible palate and a sharp sense of sight to notice the difference! 
          • Don’t try to accommodate both logs in one cookie sheet as it may spread while baking for the first time.
          • Allow the logs to cool down slightly before slicing it, other wise it may crumble.


          Make it, enjoy the deliciousness and 
          serve it to your family with love...

          Sunday, December 19, 2010

          Basic White Bread

          Recipe No: 145
          One of the American Iron Chefs, Michael Simon, said if you master a recipe, you can make one good dish, but if you master a technique, you can make hundreds of recipes using that technique. This is absolutely true, if you think, and one such technique is that of Bread making.

          Well earlier when I posted Bread stick recipe I mentioned, how much my husband loves homemade Bread. Now this is my recipe for the Basic White Bread, the one which I tried from my Kitchen Aid handbook with some adjustments in the measurement. Even though I tried many other recipes for Bread, this one seemed to be a keeper. Once you get this  right , you can go crazy with this recipe, making a whole lot of variations…
          Ingredients                                       Makes one 8 ½ inch Bread
          • Milk…………………………..1/4 Cup
          • Sugar…………………………1 ½ Tablespoons
          • Salt……………………………1 Teaspoon
          • Butter or Shortening…...1 ½ Tablespoons
          • Active Dry Yeast………….2 ½ Teaspoons
          • Luke warm Water……….3/4 Cup
          • Maida or All Purpose or Bread Flour…2 ½ to 3 Cups
          Method of Preparation
          1. Heat Milk, Salt, Sugar and Butter in a saucepan over medium heat until the Sugar is melted. Let it cool to lukewarm.
          2. Dissolve Yeast in Warm Water in a big Bowl. (Bowl of a stand mixer if you have one)
          3. Add the Milk mixture and 2 Cups of Flour and mix really well for a minute or till everything is combined. (Use a dough hook if using a Stand Mixer)
          4. Add ½ to ¾ Cup more of Flour little by little, until the dough forms a soft and sticky ball. (In a stand mixer the dough should leave the sides of the Bowl.) Use only just enough Flour to make a manageable (can be knead without much sticking) dough.
          5. Dump it on to a floured board and knead for 8 to 12 minutes. (If you are using a stand mixer let it knead on speed 2 for 3- 5 minutes) The resulting dough should be smooth and elastic.
          6. Place the dough in a greased bowl turning it once to grease the top.
          7. Cover with a damp towel and let it rise for about 2 hours or till it is doubled in bulk.
          8. Punch it down and roll it into a 14 inch circle.
          9. Fold both sides so that it overlaps slightly in the middle and then from the other side roll the dough as tightly as possible.
          10. Place it in a greased  8 ½ X 4 ½ X 2 ½ inch Bread pan. Cover with a damp towel and let it rise in a warm place till it is doubled in bulk for about 1 hour.
          11. Preheat the Oven to 350˚F/ 180˚C with a another pan filled with 2 Cups of Water in a lower rack.
          12. Bake till the top of the Bread is light brown in color or the internal temperature is 165˚F/ 74˚C.
          13. Remove from pan and let it cool on a wire rack.
          14. Slice and serve once cooled.
          Notes:
          • Bread Flour and All Purpose Flour (which is same as that of Maida) are different. Bread Flour contains a higher amount protein that will in turn develop a higher amount of Gluten when kneaded. This Gluten is responsible for the elasticity of Breads. Thus Bread flour will give a more elastic and soft Bread than that of All Purpose Flour. But you can substitute one with the other using the same measurements, even though, the results may vary slightly. As All Purpose Flour is widely available, I tend to use it more and the results are perfectly satisfactory.
          • Heating milk and then cooling it seems like a step that can be avoided but it is very crucial in determining the texture of the Bread. So please don't avoid this step. 
          • The doubling time for the dough will depend on the power of the Yeast and the temperature of the surroundings. So please wait till the dough doubles in your cooking conditions.
          • The temperature of the Water to which we put the Yeast should be lukewarm. That temperature will activate the Yeast, but if the temperature of the Water is high then it may kill the yeast. So after dissolving the Yeast in Water give it a few minutes to become active, that is shown by the bubbling of the dissolved Water. If it doesn't show a bubbling action either you have killed the Yeast or the Yeast is of poor quality (happens when it is very old). In both cases, start over again with fresh Yeast. 
          • The Water in the pan from the lower rack gives enough water vapor to keep the Bread moist.


            Make it, enjoy the deliciousness and 
            serve it to your family with love...

              Friday, December 17, 2010

              Breakfast Bruschetta

              Recipe No: 144
              This is excellent for a lazy morning brunch, which can be prepared very fast; one of my shortcuts for a Breakfast when time is short on me.
              Ingredients                                         Makes 16
              • Bread Slices…………………..…16 (I used ¾ cm thick French Baguette slices. The soft white Bread will also work, but as it is big it may not give so many pieces)
              • Melted Butter or Olive Oil…..as needed
              • Grated Cheese……………….....as needed (Optional)
              For the topping
              • Oil…………………………………..2 Tablespoons
              • Onion chopped…………………1 Cup
              • Tomato chopped………………3/4 Cup
              • Beaten Egg………………..…….4 no
              • Pepper…………………….………1/2 Teaspoon
              • Salt as needed
              Method of Preparation
              To make the Filling
              1. Heat Oil in a pan on medium high heat and saute the Onion until transparent.
              2. Add the Tomato and continue sauteing for a minute. Don’t let the Tomato mash up.
              3. Mix in the beaten Egg, Salt and Pepper. Don’t let this mixture dry up; it should be a bit on the wet side.
              4. Off the heat and keep it aside till ready to be used.
              To make the Bruschetta
              1. Switch on the Oven on a Broil mode (high) and set the Oven rack on the second level from the top.
              2. Brush the Bread slices with melted Butter/Oil and arrange on a baking tray in one layer.
              3. Put this on the second rack from the top in the Oven and broil for 2-3 minutes or till the edges of the Bread browns slightly. This time will vary depending on the freshness and softness of the Bread, so keep an eye on it.
              4. Take it out and turn it over and let the other side also crisp up.
              5. Take it out of the Oven and top it with the Egg mixture.
              6. Sprinkle Cheese on top of the Egg (if using) and keep it back in the oven for a minute or two till the Cheese melts and the sides of the Bread and top of the Egg starts to brown up slightly.
              7. Remove it from the Oven and serve hot.
              Notes:
              • If you are using soft white Bread, set the Oven rack on the third level from the top and toast it for some more time.
              • If your Bread starts to darken fast without becoming crispy, move it to a lower level in the Oven.
              • If you keep this dish  for long the Bread will become soggy. This will happen fast if you use soft bread.
              • This tastes the best when served hot.
              • Instead of brushing the Bread with Butter or Oil, you can simply use a cooking spray.


              Make it, enjoy the deliciousness and 
              serve it to your family with love…

              Thursday, December 16, 2010

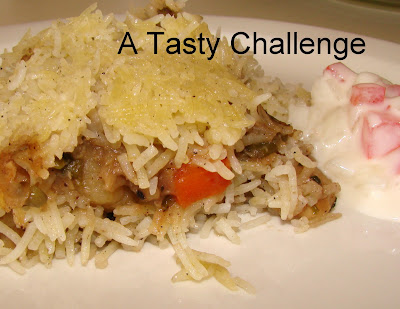
              Vegetable Stew Rice

              Recipe No: 143
              Yesterday, while I was talking to a friend of mine who successfully tried my Chicken Stew Rice recipe (for recipe click here), I mentioned about its vegetarian version. As she showed some interest in knowing the vegetarian version and as most of the Christians are going through the Lent season, I thought it was a good idea to post it. The procedure for both Chicken and Vegetable versions are the same but the amount of ingredients are modified to mask the absence of Chicken.
              Ingredients                                                                Serves 5 adults
              For the Stew
              • Vegetables cubed……………..3 ½ Cups (I used Carrots, Beans, Potatoes and Fresh Green Peas)  
              • Oil…………………………………..1  Tablespoon
              • Whole spices………………......3 Cardamom pods, 6 Cloves and 1 one inch Cinnamon piece)   
              • Onion chopped……………......1/2 cup
              • Ginger chopped…………….....1  Tablespoon
              • Garlic chopped……………......1  Tablespoon
              • Indian Green chilly………….4, split into halves (Depending on your taste. If you are using hotter verities use only less)
              • Tomato sliced…………………..1/2 large
              • Thin coconut milk……………3/4 cup (mix 1/4 cup canned thick coconut milk with ½ cup water)
              • Thick coconut milk…………...3/4 cup
              • Pepper powder………………....1/2 Teaspoon
              • Homemade Garam Masala…1/2 Teaspoon (powder)
              • Coriander leaves chopped…..3 Tablespoons
              • Salt as per taste
              • Oil…………………………………..1 Tablespoon
              • Shallot sliced…………………...1 Tablespoon
              • All purpose flour/ Maida……1 ½ Teaspoons
              • Water……………………………..1/4 cup
              To make rice
              • Ghee………………………………..1 Tablespoons
              • Whole Garam Masala………..3 Cardamom pods, 6 Cloves, 1 one inch Cinnamon stick                                                   and a small piece of Star Anise) 
              • Rice ………………………………..1 1/2 cups
              • Boiling Water…………………...3 cups
              • Salt …………………………………1 Teaspoon
              Method of Preparation
              To make the Stew 
              1. To a shallow pan on medium heat, add 1 Tablespoons of Oil, add the crushed whole Garam Masala and saute till it is fragrant.
              2. Add chopped Onion, Ginger, Garlic and Green Chilly and saute till everything is wilted for about3 minutes.
              3. Add the Vegetables and saute for 1 minutes on high heat.
              4. Add thin Coconut Milk and Salt. Once this is boiled, reduce the heat to low and cook till the Vegetables are almost done.
              5. Add sliced Tomato and continue cooking.
              6. In another shallow pan add 1 Tablespoon of Oil and saute the Shallots till brown.
              7. Adjust the heat to medium and add 1 ½ teaspoons of Flour and saute till its raw smell is gone. This step takes time, so be patient.
              8. Add ¼ cup water and mix till everything is combined well with no lumps. Add this to the already cooked stew and mix well.
              9. After a minute of boiling, add the thick Coconut Milk, Pepper Powder and Garam Masala Powder. Check the seasonings.
              10. If there is extra gravy, let it dry. This stew should be thick. When it’s almost thick, add the Coriander leaves and switch off the flame. 
              To make the Rice
                1. While the Stew is cooking, make the Rice.
                2. Wash and soak the Rice for 15 minutes. Then let it drain.
                3. On a pan on medium high heat, add the Ghee followed by whole Garam Masala. Saute it till fragrant.
                4. Add the rice and fry it good (till the grains on the bottom of the pan start to move on its own).
                5. Add boiling Water and Salt.
                6. Close the lid, lower the heat to minimum and let it cook till all the water is absorbed.
                7. Once done just fluff up the rice and keep it open till assembling the rice.
                  Assembling the dish and baking
                  1. Preheat the oven to 350˚F/180˚C
                  2. I used a bunt pan. But you can use any oven proof dish. Apply a slight coating of ghee on the bottom and sides of the dish.
                  3. Line the bottom of the pan with 1/3rd of the rice, followed by ½ of the Vegetable Stew, then another layer of Rice and the rest of the Stew.
                  4. Put the rest of the rice into the pan in which you made the Stew and swirl it around so that it picks all the gravy left in the pan. This will add extra moisture and taste to the dish.
                  5. Layer this on top of the baking dish. Push all the layers a bit so that the rice and the Vegetables will all stay compact.
                  6. Cover the top with Aluminum foil and bake for 30 minutes. Let it cool down for 10 minutes.
                  7. If you are using a bunt pan turn it over into a nice flat plate and serve it warm with a spicy pickle and Raita.
                  Notes:
                  • When the Stew is made, the Salt should be on the higher side, so that when mixed with the Rice it should be perfect.


                    Make it enjoy the deliciousness and
                    serve it to your family with love….