Creating a blog was out of the question for a long time for me, as measuring everything in the kitchen was like biting into an eggshell. I enjoy cooking and don’t want to waste even a slightest bit of enjoyment in that small world of mine. But little did I know that everything will change, when my husband came home with the Oscar nominated film ‘Julie and Julia’( a real life story) where Julie Powell (part played by Amy Adams) challenged herself to make all the 524 recipes from Julia Child's cook book ‘Mastering the Art of French Cooking’ and blogging all her experiences (The Julie/Julia Project). It was an inspiring movie. A few days later when we were discussing this casually with a friend of ours over tea…everything changed dramatically…..” How about you making at least half of it in one year? Not French but your own. 262 recipes that will inspire others and present it as a blog?” For a minute my mind traveled faster than light… With an experience as a helper in my mother in laws kitchen for 6 years followed by a three year everyday struggle to satisfy the palate of my foodie husband, if I cannot do it then why should I cook? But on the other side with an experience in English literature extending no more than expanding outline stories in English grammar class when I was 18 and two small kids that come in handy at times, will a commitment for the next one year work? Anyway my ‘cook's ego’ didn’t allow me to say no...

So my friends …here I am opening my recipe book, trying to perfect and present 262 recipes in the coming 365 days….A Challenge that will of course tastes good. Come.. Have a walk with me along my journey.. Cheering and inspiring….Forgiving and tolerating…Testing and tasting….for ‘A Tasty Challenge’

Search This Blog

Sunday, February 27, 2011

Potato Thoran

Recipe No: 207
We love anything and everything with Potato and this used to be one of my favorite Thorans growing up… one vegetarian dish that I ate without my Mother forcing me…
Ingredients                                              Serves 4-5
  • Potato cut into thin long pieces…..2 Cups (1 really big Potato, sliced into 1 1/2 cm long pieces)
  • Oil…………………………....................2 Tablespoons
  • Mustard seeds…………...................1/2 Teaspoon
  • Dry Red Chilly……………................2 (Split into 2)
  • Shallots sliced…………….................2 big
  • Green Chilly sliced thin.….............2
  • Curry Leaves…………………............1 sprig
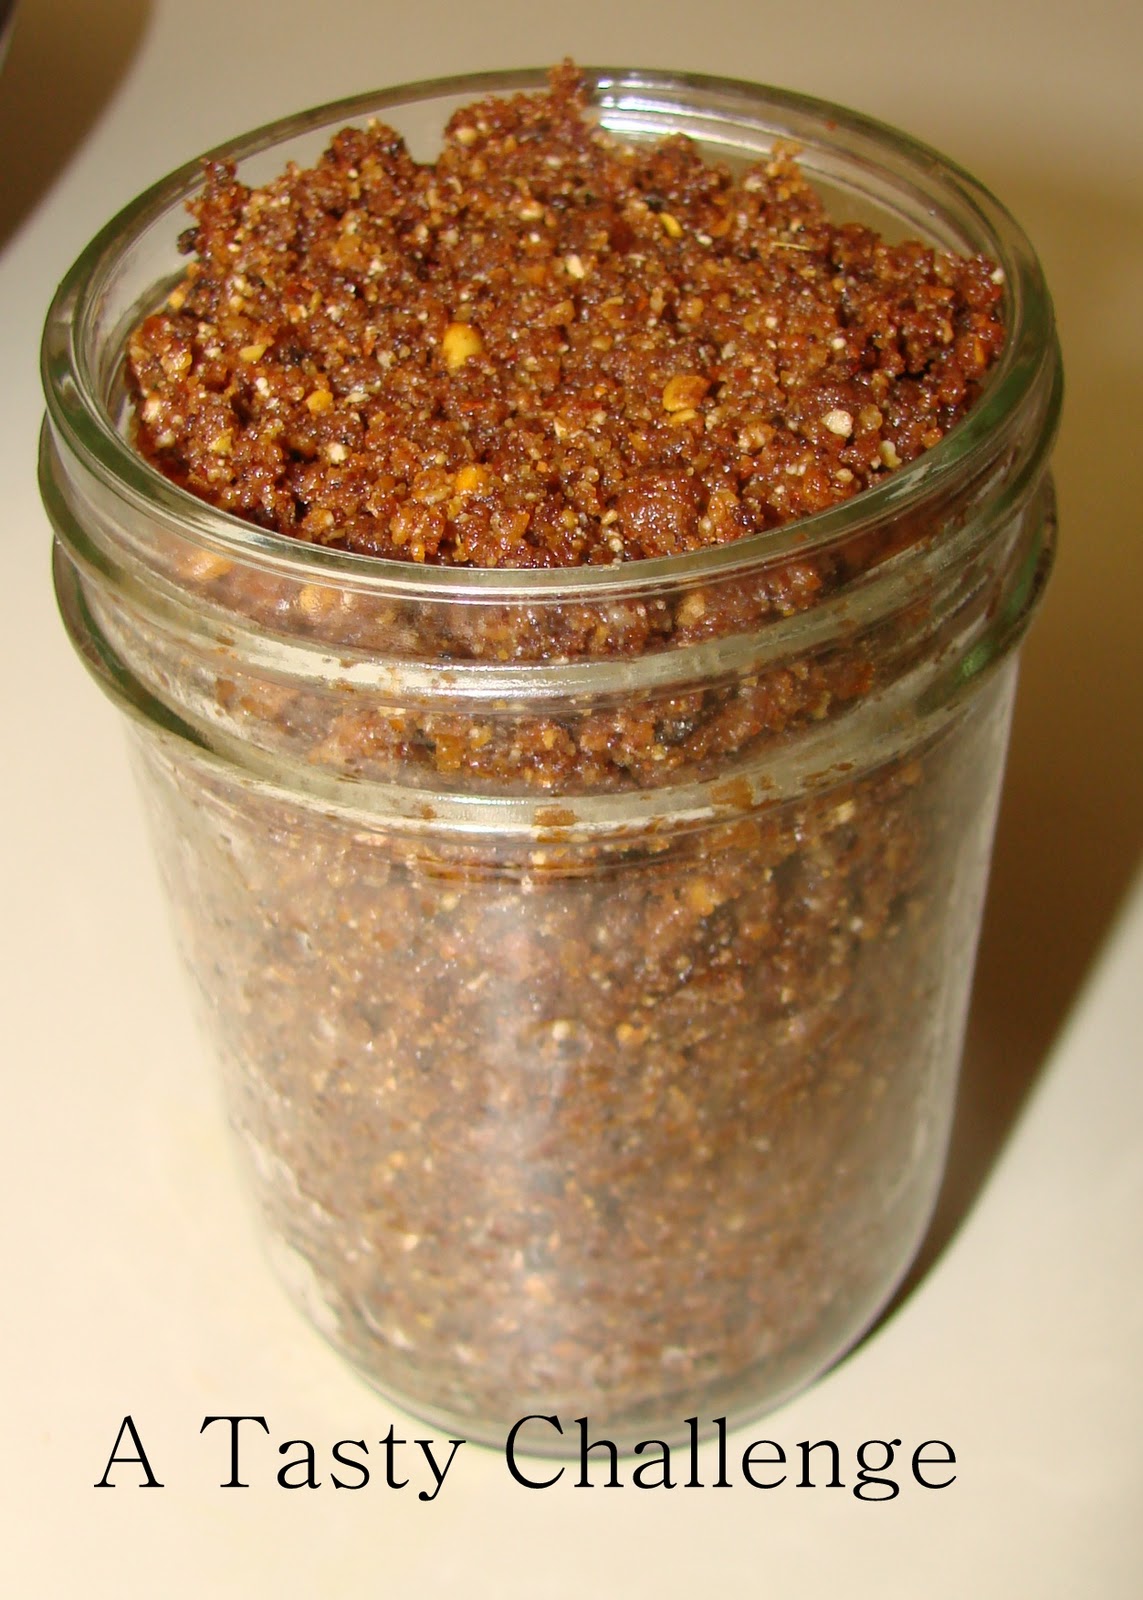
  • Grated  Coconut…….....................1/3 cup (unsweetened)
  • Turmeric Powder………………………1/4 teaspoon
  • Salt as needed
Method of Preparation
  1. Mix together Coconut, Turmeric powder and Salt really well and keep aside till ready to be used.
  2. Heat Oil in a pan on medium high heat and splutter the Mustard Seeds.
  3. Add Dry Red Chilly, Shallots, Curry Leaves and Green Chilly; fry till it starts to brown along the edges.
  4. Add drained Potato and saute for a minute.
  5. Make a well in the middle by pushing the Potato to the sides of the pan and place the Coconut mixture in the middle.
  6. Cover the Coconut mixture with Potato from the sides; close the pan; lower the heat and let it cook for 4-5 minutes or till the Potato is just cooked.
  7. Open it and mix everything really well and saute for 30 seconds before serving hot with Rice.
Notes:
  • Don’t forget to keep the sliced Potatoes in cold Water to prevent it from browning. But , drain it well before making this dish.
  • Don’t overcook the Potatoes as it will mash and form clumps easily.


Make it, enjoy the deliciousness and 
serve it to your family with love…

Idi Chammanthi/ Chammanthippodi/ Sammanthipodi/ Coconut dry Chutney Powder

Recipe No: 206
Every household in Kerala will have a recipe for this. I don’t know how many Grandmothers and Mothers made this and still making this to send it to their loved ones abroad. Apart from the fact that this will stay good for a long time at room temperature and a very long time in the refrigerator, this is an excellent combination to eat with Rice and Curd.

Once, a friend of ours gave a packet of Chammanthippodi, which they bought from a homegrown business somewhere near Kottayam, Kerala. Well, that was one the best Chammanthippodi that I ever ate, but felt really different. But while eating that, I came across a fried Urad Dal which gave me the idea for this. So I changed my Mother's recipe  a bit so that it imitates the one that I liked a lot by incorporating Urad Dal... and have to say the Urad Dal gives a very different but a very pleasant texture.
Ingredients
  • Grated Unsweetened Coconut…2 ½ Cups (Fresh/ Frozen preferred, don't use dessicated)
  • Split Urad Dal……………………….1/4 Cup (Washed and drained)
  • Dry Red Chilly……………………...20 (break into small pieces, adjust according to your taste)
  • Tamarind………………………..……1 inch diameter piece
  • Curry Leaves…………………..…….2 Sprigs
  • Salt as needed
Method of Preparation
  1. In a dry pan on medium high heat, add all the ingredients except Salt and fry till evenly browned stirring constantly.
  2. Once browned, off the heat and let it cool.
  3. Grind it into a course powder together with Salt and store in an airtight container.
  4. Serve with Rice (and with everything else or simply by itself as per my husband!!!).
Notes:
  • Frying the Tamarind along with the other ingredients will take away some of its moisture that will help while dry grinding.
  • It will take at least 1/2 an hour to get the mixture fried. Don't try to rush the process by increasing the heat as it will burn the mixture without frying evenly.
  • Don’t leave the mixture unattended in the same pan after switching it off, as the residual heat may burn the bottom. So do stir it often till it cools down or transfer it to another plate.
  • It is not possible to grind this using a blender. You have to use a dry grinder or a Coffee Grinder.


Make it, enjoy the deliciousness and
serve it to your family with love…

Saturday, February 26, 2011

Egg Stuffed Cutlets

Recipe No: 205
Cutlets are one of the most popular appetizers among us. Well I should say, if you want your guests to go ‘hmm’, then try this… It can be made using whole hard boiled Eggs and when you serve you can cut them into halves or quarters. But I love to conceal the Egg inside and let the person who eats, discover the secret.
This can be a two in one recipe… The Beef- Potato mixture is the same as of regular Beef Cutlet; when you want it simple, just leave the Egg out. But if you want to take it to another level and surprise your guests, use the Egg for the stuffing.
Ingredients                                        Makes 12
  • Cooked and minced Beef…............1 ½ Cup
  • Hard boiled Eggs……………...........3 (Cut into quarters)
  • Oil……………………………………....….2-3 Tablespoons
  • Garam Masala Powder………........3/4 Teaspoon
  • Pepper Powder………………........….1/2 Teaspoon
  • Coriander leaves chopped…….......2 Tablespoons
  • Potato (Boiled and mashed)….......1 Large (or 1 ½ Cups)
  • Oil for deep frying
  • Salt to taste
To Grind or Chop fine
  • Onion cubed.........................1 cup
  • Garlic……………………………...6 big cloves
  • Ginger………………………….….1 big piece
  • Indian Green Chilly…………..4 big ones
To coat and fry
  • Eggs……………………………….2 beaten with 2 Tablespoons Water and a pinch of Salt
  • Bread Crumbs……………….…1 Cup
Method of Preparation
To make the Meat- Potato mixture
  1. Grind coarsely or chop fine Onion, Green Chilly, Ginger and Garlic.
  2. Heat Oil in a pan and saute the ground mixture until slightly brown, together with a bit of Salt.
  3. Add minced Beef followed by Garam Masala Powder, Pepper Powder and Coriander Leaves. Mix thoroughly.
  4. Off the heat and add the mashed Potato and mix well. Add more Salt if necessary at this point.
To make and fry the Stuffed Cutlets
  1. Divide the Beef - Potato mixture into 12 equally sized balls.
  2. Take one portion and press it with your palms and fingers to make a thin round.
  3. Place a piece of Egg in the middle and cover it with the Beef mixture from the sides so  that the Egg is sealed inside the Beef - Potato mixture. Repeat this with all the 12 portions.
  4. Dip it in the beaten Egg and roll in the Bread crumbs. Keep them aside.
  5. Heat at least two inches of Oil in a pan and deep fry these stuffed Cutlets until golden brown on both sides and serve hot.
Notes:
  • Cook Beef with ¼ teaspoon of Pepper Powder and ¼ Teaspoon of Salt in a pan until the Water oozed out dries up. (Not necessary to cook in a Pressure cooker) Then shred it in a food processor or a blender.
  • If you don't eat Meat, please substitute it with Chicken, Turkey, Soy chunks or Paneer.
  • The Onion and Green Chilly should be very fine; otherwise they will keep coming out of the mixture. I love to add chopped Curry Leaves too while sauteing.
  • In any case if the Beef Potato mixture is sticking, then wet your hands a bit.
  • Cut fresh Bread into small pieces and grind into Crumbs in a food processor or a blender for fresh Bread Crumbs.
  • There shouldn’t be any cracks on the Cutlets otherwise it may splatter while frying.
  • The Cutlets should be immersed in Oil while frying. If you use less Oil the temperature of the Oil will drop once you put the Cutlets which results in over absorption of Oil by the Cutlets.
  • If in any case Oil is only coming up to the sides of the Cutlets, then temperature will increase in the portion of the Cutlet lying in the Oil. This will cause cracks in between these two portions. So a way to avoid this is to turn the Cutlet over after 30 seconds of putting it in hot Oil so that the temperature will be even on both sides which will prevent a lot of cracking.


Make it, enjoy the deliciousness and 
serve it to your family with love…

Irachi Thoran (Meat Stir Fried with Coconut)

Recipe No: 204
This used to be one of our usual lunch box specials… My Mother made this practically every day, as three of us used to love this for our lunch while we were in schools. After all these years, I still remember those School days...opening the lunch box and smelling Irachi Thoran when I taste this dish.
Ingredients                                           Serves 4
  • Cooked and Shredded Beef….1 Cup
  • Coconut Oil……………………....1 Tablespoon
  • Mustard Seeds…………………..1/2 Teaspoon
  • Dry Red Chilly………………..…1 (split into two)
  • Shallots sliced…………………...2 big
  • Ginger……………………………..1 small piece (chopped)
  • Curry Leaves…………………....1 Sprig
  • Garam Masala Powder………1/2 Teaspoon
  • Black Pepper Powder………...1/4 Teaspoon
To grind
  • Grated unsweetened Coconut….1/4 cup
  • Shallots…………………………………2
  • Green Chilly………………………....1 big
  • Garlic………………………………..…1 big
  • Turmeric Powder………………….1/2 Teaspoon
  • Salt as needed
Method of Preparation
  1. Grind all the ingredients in the ‘to grind’ section slightly and keep aside till ready to be used.
  2. Heat Oil in a pan on medium high heat and splutter the Mustard seeds.
  3. Add Dry Red Chilly, Shallots, Ginger and Curry Leaves and saute till golden brown.
  4. Add the minced Meat and saute for a minute. Push the Meat to the sides and put the Coconut mixture in the middle and cover it with the Meat from the sides.
  5. Cover the pan, lower the heat and cook it for 3-5 minutes.
  6. Open the pan and mix everything; add Garam Masala Powder and Pepper Powder.
  7. Mix everything together really good and saute for a minute or two and switch off the heat.
  8. Serve hot with Rice.
Notes:
  • If you are using Salt while cooking the Meat, use only less while grinding.
  • You can do this without grinding also. Slice Green Chillies and saute it first. Then when its time to use the Coconut just mash it with your hands with Turmeric and Salt.
  • This will stay really good in lunch boxes.


Make it, enjoy the deliciousness and
serve it to your family with love…

Thursday, February 24, 2011

Pepper Chicken

Recipe No: 203
I got this idea from one of our Aunts and thought it is definitely a good spin on this dish which usually comes  with a lot of spices. I changed it a bit, but tried to keep very close to the original idea that I was told. This doesn’t have any of the usual spices and will go well with Fried Rice (anything of that sort) and Flat breads.
Ingredients                                             Serves 4
  • Chicken………………………600 grams (Cut into very small pieces; I used bone in)
To marinate the Chicken
  • Pepper Powder…………...1/2 Teaspoon
  • Salt……………………….…..3/4 Teaspoon
  • Ginger Garlic Paste….....3/4 Teaspoon
  • Vinegar………………….....1 Teaspoon
To Saute
  • Oil………………………..….......3 Tablespoons
  • Crushed whole spices.........2 Cardamom, 5 Cloves, 1 small piece Cinnamon and Star Anise
  • Ginger chopped fine…........2 Tablespoons
  • Garlic chopped fine………....2 Tablespoons
  • Onion chopped fine………...3/4 cup
  • All Purpose Flour/ Maida…1 ½ Tablespoons
  • Coriander Leaves…………….2 Tablespoons (chopped)
  • Crushed Black Pepper….....1 Teaspoon (Freshly made)
  • Salt to taste
Method of Preparation
  1. Marinate the Chicken with the ingredients present in ‘to marinate’ section and keep aside for 20 minutes.
  2. Heat 3 Tablespoon of Oil in a pan on high heat and fry the Chicken pieces till slightly brown on all sides.
  3. Remove the Chicken form the pan and add the crushed spices to the remaining Oil; fry till fragrant.
  4. Lower the heat to medium and add Ginger and Garlic; saute till the raw smell is gone.
  5. Add chopped Onion and saute till it is wilted thoroughly.
  6. Sprinkle the Flour and fry for a minute or two till the raw smell is gone. Add a bit more of Oil at this stage if it is too dry.
  7. Add the Chicken pieces and a cup of Water; mix well; cover the pan and let it cook till done. Add more Salt if needed.
  8. Once the Chicken is cooked and the gravy is reduced to a consistency you want, add Coriander Leaves and crushed Black Pepper; mix well; switch off the heat and serve hot.
Notes:
  • Crushed Black Pepper  used towards the end should not be finely crushed, it should be course.
  • Make this on the dry side if you want, but I love to have some gravy as I usually serve this with Chappathi.
  • Add a teaspoon of Soy Sauce at the end to get a different taste.


Make it, enjoy the deliciousness and 
serve it to your family with love…

Tuesday, February 22, 2011

Strawberry Pudding

Recipe No: 202
A few days back, while talking to a friend over phone, she mentioned how much her daughter wants to eat Strawberry pudding. 'Well that is a good idea' I thought... as my daughter herself is a big Strawberry fan. I decided not to use fresh Strawberries as it may not be available year round and Strawberry preserves and syrups are available in most places. (I remember buying it from Food World, Thiruvanandapuram, 6 years back!!!) So here is a recipe that can be made at any time of the year…
Ingredients                                              Serves 12-15
  • Milk………………………..2 Cups
  • Eggs…………………….….2 (Beaten well)
  • Sugar………………….…..1/2 Cup
  • Gelatin…………………....1 Tablespoon
  • Corn Starch……………..1/2 Teaspoon (Dilute with 2 tablespoons of Water)
  • Strawberry essence…..1 Teaspoon (If not available please avoid, but don't substitute with any other)
  • Strawberry Syrup…….5 Tablespoons
  • Strawberry Preserve…5 Tablespoons (recipe here) (Warm it in the microwave for 20 seconds to loosen it. Cut the big Strawberries (if any) into small pieces)
  • Heavy Cream…………..1 Cup
  • Sugar………………….….2 Tablespoons
Method of Preparation
  1. Soak Gelatin in ¼ cup cold Water and keep aside for 10 minutes.
  2. Heat Milk and ½ cup Sugar on medium heat.
  3. When hot, pour ½ cup of hot Milk into the Egg, mix well and pour it back into the hot milk on the stove, stirring continuously.
  4. Once the Eggs are mixed, add the soaked Gelatin and the diluted Corn Starch; let it come to a simmer (by that time it will be thick), stirring constantly.
  5. Remove it from the stove and place it in a bigger pan filled with cold Water and let it cool down. Don’t forget to stir.
  6. Once cooled, strain it and add Strawberry Essence, Syrup and Preserve; mix well and keep  aside till it cools completely.
  7. Whip Cream and 2 tablespoons of Sugar well until soft peaks are formed.
  8. Fold the Whipped Cream into the Strawberry Custard  gently.
  9. Pour it into a 10 X 8 inch pan (or something that big); cover with a foil and refrigerate for at least 6 hours before serving.
  10. Cut it into desired shapes and serve cold decorated with Strawberries, sweetened whipped Cream and Strawberry Syrup.
Notes:
  • If you pour beaten Egg into the hot milk, the heat will scramble the Eggs. But pouring a part of the hot Milk into the beaten Eggs will raise its temperature, which when poured back into the hot Milk on the stove resist scrambling. (The process is called tempering the Eggs.)
  • Diluted Corn Starch tends to settle down in the bottom of the dish when left untouched for a while. So mix it really well just before using.
  • Do strain the Custard as it will get rid of any solids (cooked Egg) present.
  • Cold heavy Cream whips up really fast.
  • When you lift the beater from the cream, the peaks formed should stay as such(shouldn’t fall down) for a soft peak stage.
  • Fold the Cream gently so that it won't deflate the air incorporated in the Cream at the same time it is mixed evenly with the Custard.
  • This pudding is really soft yet stable enough to be cut into desired shapes.


Make it, enjoy the deliciousness and 
serve it to your family with love…

Monday, February 21, 2011

Chicken Squares

Recipe No: 201
Puff Pastry is one of our family favorites… any savory snacks made from it is a hit at ours…and no difference with this one too…
Ingredients                                   Makes 16
  • Puff Pastry Sheet…………….1 (9 ½ inch square)
  • Egg………………………………..1 (Beat with a tablespoon of Water)
  • Shredded Cheese…………....as needed (I used Cheddar, but any melting Cheese like Mozzarella will work)
For the filling
  • Butter/ Oil………………………..1 Tablespoon
  • Flour…………………………….…3/4 Tablespoon
  • Milk……………………………..….1/2 Cup
  • Cooked, Shredded Chicken...2/3 Cups
  • Salt and Pepper to taste
Method of Preparation
  1. Preheat the oven to 400˚F/ 204˚C.
  2. Cut the Puff Pastry sheet into 16 equal squares (3 cuts at equal distance on both sides).
  3. With a small round Cookie cutter (1 ¼-1 ½ inch in diameter) make a mark on top of each piece. (Don’t press it whole the way through.)
  4. Brush the top of the pastry sheets with the beaten Egg and bake  it in the preheated oven for about 14-16 minutes or till the top of the Puff Pastry is golden brown in color.
  5. Once browned, remove  from the oven and let it cool slightly.
To make the filling
  1. Melt Butter in a pan on medium heat and add the Flour.
  2. Mix and let it fry till the raw smell is gone.
  3. Whisk in the milk taking care to avoid forming lumps. Let it become thick, stirring constantly.
  4. Mix in the Chicken and add Salt and Pepper as needed. Let this cook till it thickens. Switch off the heat and keep it aside till ready to be used.
To assemble and make the Chicken Squares
  1. Once the Puff Pastry Shells are cooled slightly, cut the top along the circular mark with the help of a sharp pointed knife, taking care not to cut till the bottom.
  2. Press the small round with the finger so that it forms a small well.
  3. Fill the well with the Chicken filling and top it with a very small amount of Cheese.
  4. Put this back in the hot oven for a few minutes till the Cheese is melted.
  5. Serve hot.
Notes:
  • While making the filling, use Cold milk and whisk really good to avoid lumps.
  • Take care not to add a lot of Cheese on top of the Chicken for it may cover the top of the Pastry when melted.
  • Instead of Chicken you can use any other filling to make this dish.
  • If the oven is hot from baking the pastry, then you don't have to switch it on again. The residual heat will melt the Cheese.
  • You can make the shells in advance, but fill it and reheat it all the way through just before serving. (Don't fill in advance for it might make the bottom of the pastry soggy.)


    Make it, enjoy the deliciousness and 
    serve it to your family with love…

    Saturday, February 19, 2011

    Avalose Podi

    Recipe No: 200
    This is another one of my Mother's recipe. Usually served with Banana and Sugar, this is one of the traditional teatime/ after school favorites. Another fact that has to be mentioned is that, this is the base for Avalose Unda/ Mavunda (made into a ball with Jaggery) and Churuttu (I hope to publish the recipes soon).
    Ingredients                                           Makes around 2 ½ cups
    • Raw Rice Flour…………………2 Cups (Coarsely ground)
    • Freshly grated Coconut…....1 Cup
    • Whole Cumin Seeds……….…1 Teaspoon
    • Whole Sesame Seeds………..1 Teaspoon
    • Salt…………………………….….1/8 Teaspoon
    Method of Preparation:
    1. Mix Coconut, Cumin Seeds, Sesame Seeds and Salt well.
    2. In a frying pan put the Rice Flour; make a well in the middle by moving the Flour to the sides and place the Coconut mixture in the middle.
    3. Cover the Coconut mixture with the Flour from the sides; cover the pan and let it sit  for 30 minutes. (No fire at this stage.)
    4. After 30 minutes, mix the Rice Flour and the Coconut mixture thoroughly with your hands to break the big lumps if any; switch on the stove and adjust the heat to a medium low.
    5. Fry the Rice Coconut mixture stirring constantly until it reaches a pink color. (Believe it or not, it took around 30 minutes for me). Don’t try to rush this process as it will result in the burning of Flour without cooking and frying evenly.
    6. Once evenly browned, switch off the heat and store it in an airtight container when cooled.
    7. Serve it at room temperature with Sugar and Banana.
    Notes:
    •  For Raw Rice Flour, either make your own or use frozen rice flour from the frozen section of Asian Grocery stores or use regular Rice Flour that is available in the Grocery stores (the usual ones are very near to raw Flour; but avoid roasted Flour like Puttu Podi or Idiyappam Podi.)
    • To make fresh Rice Flour wash and soak white Rice (approximately 1 1/2 cups to get this quantity) for 6 hours; drain properly and grind it into a course powder.
    • The Grated Coconut should be finely grated. If it is in long threads do pulse it once or twice in a grinder to make it small.
    • Constant stirring throughout the process is very important.
    • Don’t brown the Avalose Podi, slightly pink (or very light brown) is the correct time to switch off the heat (The pictures that I took is not doing any justice to the color... but please compare the White color of Sugar and the Pink color of Avalose Podi in the picture below). When you eat some at this stage it will be a bit crisp and the big pieces will be crunchy and there will be a good fried smell.
    • You have to keep the mixture stirring for some more time after switching the flame off , otherwise, the Flour in the bottom of the pan may burn due to the residual heat or transfer the content to another dish immediately.


    Make it, enjoy the deliciousness and 
    serve it to your family with love…

    Green Chilly Chicken Masala

    Recipe No: 199
    Recently while going through my postings on Chicken, I felt something missing… an everyday Chicken recipe that can be made without much fuss. This is one such dish which can be made easily without much sauteing and frying… yet a bit different as we are using only Green Chilly for heat.
    Ingredients                                      Serves 6
    • Chicken………………………..750 grams (cut into small pieces)
    • Oil……………………………….2 Tablespoons
    • Onion sliced thin…………..2 cups
    • Indian Green Chilly……….15-18 split (depending on your tolerance level)
    • Coriander Powder…………1 ½ Teaspoons
    • Turmeric Powder………….1/4 Teaspoon
    • Garam Masala Powder….3/4 Teaspoon
    • Ginger Garlic paste………..1 Teaspoon
    • Coriander Leaves………….2 Tablespoons (chopped)
    • Curry Leaves………………..1 Sprig
    • Salt as needed
    To grind into a paste
    • Shallots sliced……………….1/2 cup
    • Tomato chopped……………1 Cup (I removed the seeds)
    Method of Preparation
    1. Heat Oil in a pan on medium high heat and saute the Onion, Green Chilly and Curry Leaves till translucent.
    2. Add Coriander Powder, Turmeric Powder and Garam Masala Powder; saute for a minute.
    3. Add Chicken, Salt and Coriander leaves; mix well.
    4. Add ½ cup Water; close the pan and let the Chicken cook on medium low heat.
    5. While the Chicken is cooking, grind Shallots and Tomato into a paste and keep aside till ready to be used.
    6. Half way through the cooking process add the ground Tomato and Shallot mixture and let it finish cooking.
    7. Once finished cooking, add the Ginger Garlic paste and mix well.
    8. Let it boil for 2 more minutes; adjust the Salt level and off the heat.
    9. Serve hot with Rice, Flat breads, Appam, Puttu etc:
      Notes:
      • If you want your Chicken to be firm and not fall off in the Curry, do shallow fry it in a non stick pan with 3-4 Tablespoons of Oil after marinating it with Salt and 1/4 teaspoon Turmeric Powder. You can do the rest of the process in the same pan in the leftover Oil.
      • You don’t have to saute the Onion for a long time; only till it reaches a translucent stage.
      • Please do keep the leftovers in the refrigerator. 
      • You can use either fresh or frozen Shallots for this. Frozen Shallots are available in the freezer section of most of the Indian grocery stores. 
      • Adding Ginger Garlic paste at the end  gives a very distinct taste to the dish.


      Make it, enjoy the deliciousness and
      serve it to your family with love…

      Wednesday, February 16, 2011

      Chicken Vada

      Recipe No: 198
      Many a days during my childhood I woke up to this ‘tuk… tuk’ sound from the kitchen, which is my Mother chopping Meat on her wooden cutting board for making Irachi/ Meat Vada. Within seconds I will come to the realization that my maternal Grandfather is visiting that day… yes… it was one of his favorite dishes…
      This is the Chicken version of the delicious Irachi Vada, which has all the flavors of a traditional Vada yet very easy to make.
      Ingredients                                                 Makes 12
      • Skinless, boneless Chicken……..300 grams
      • Shallots chopped fine…………….1/4 Cup
      • Ginger chopped fine………………1 Tablespoon
      • Indian Green Chilly chopped….1 Tablespoon
      • Salt……………………………………..2/3 Teaspoon
      • Curry leaves chopped fine……..4-5 leaves
      • Crushed Black Pepper…………...1/4 Teaspoon (optional)
      • Cooked Rice………………………….1/2 Cup (mashed really good)
      • All Purpose Flour (Maida) or Corn Flour for dusting the patties
      • Oil for deep frying
      Method of Preparation
      1. Chop the Chicken on a cutting board  finely. (I didn’t use a food processor for chopping as it will make the Chicken pasty.)
      2. Mix all the other ingredients except the Oil and Flour with the chopped Chicken  really well.
      3. Make 15 equal portions out of the Chicken mixture. This may be a bit on the sticky side. So wet your hands lightly with Water to avoid sticking.
      4. Make each portion into a ball; press slightly to flatten it and dust lightly with All Purpose/ Maida or Corn Flour.
      5. Heat at least an inch of Oil in a pan and deep fry the Vadas for about 2-3 minutes on each side or until cooked through.
      6. Serve hot with Ketchup.
      Notes:
      •  Cooked Rice is the binding agent here. Don't use Egg instead, as it makes the mixture watery or mashed Potato as it  changes the taste of the dish.
      • As we wet our hands to avoid the chicken sticking, it is essential to dust the Vadas slightly with Flour, otherwise it will splatter in hot Oil.
      • Here I used Chicken breast meat, but Chicken thigh meat is better when it comes to taste (at least for me). If you are using Thigh meat please do give it a minute more to cook.
      • There is a chance for the Chicken Vada to shrink and become more round in shape while frying, so flattening it before frying is essential.


      Make it, enjoy the deliciousness and 
      serve it to your family with love…

      Tuesday, February 15, 2011

      Biscuit Mocha Slice

      Recipe No: 197
      This is a frozen dessert that will stay good in the freezer for days… It is totally a make ahead dessert which is very good for small family gatherings or after dinner with some friends specially if there are kids or simply for your own family to enjoy…
      Ingredients                                      Serves 8
      • Marie Biscuit…………………..1 packet (any arrowroot variety will do)
      • Instant Coffee Powder……..2 Tablespoons (I used Bru)
      • Boiling Water………………….1 Cup
      • Heavy cream…………………..2 Cups
      • Chocolate Powder……………1 ½ Tablespoons
      • Powdered Sugar………………1 Cup
      • Vanilla Essence……………....1/2 Teaspoon
      Method of Preparation
      1. Dissolve Instant Coffee Powder in boiling Water and let it cool to lukewarm.
      2. Whip Heavy Cream till foamy and add Chocolate Powder, Powdered Sugar and Vanilla Essence and continue whipping till thick. (Don’t whip too much as we don’t want a standing consistency)
      3. Prepare a loaf pan by lining the bottom with an Aluminum foil. Let the foil extend through the sides which will help us while taking the dessert out.
      4. Add a small layer of the Cream mixture in the bottom (I accidentally missed that step, but that will make this dessert look pretty).
      5. Dip the biscuits one at a time in warm Coffee for 5 seconds and arrange  as a layer on top of the Cream mixture.
      6. Once a layer of Biscuit is placed, top it with another layer of Cream.
      7. Continue layering Cream and Biscuit alternately till all the Biscuits are used and make sure you end up with Cream on top.
      8. Cover this and refrigerate for 10- 12 hours.
      9. While serving, put the dessert upside down on a plate. If there is no foil on the sides do run a knife along that side and use the foil to get it out of the pan.
      10. Peel the foil and slice the frozen dessert into desired thickness and serve cold.
      Notes:
      • Don’t use Glucose Biscuits instead of Arrowroot as it will make this dish overly sweet.
      • In order to slice this frozen Dessert easily, let it stand at room temperature for 2-4 minutes before slicing.
      • Do freeze the leftovers as soon as possible or it will melt.


      Make it, enjoy the deliciousness and
      serve it to your family with love...

      Monday, February 14, 2011

      Sautéed Spinach n Chickpea with Quail Eggs

      Recipe No:196
      This can be served as a side dish to Rice or Chappathi as well as a Warm Salad. The Eggs are completely optional, so whether to use it or not is entirely up to you but, I think the presence of Eggs makes this dish complete.
      Ingredients                                             Serves 2
      • Oil………………………………..1 Teaspoon
      • Shallots sliced……………....2 big
      • Garlic sliced………………....1 big
      • Dry Red Chilly………………2 crushed
      • Spinach………………………..3 Cups (Washed and drained thoroughly)
      • Cooked Chickpea………....1/2 cup (Channa)
      • Hard Boiled Quail Eggs….4
      • Salt to taste
      Method of Preparation
      1. Heat Oil in a pan on medium heat and fry the Shallots and Garlic till transparent.
      2. Add the dry Red Chilly, followed by Spinach and cooked Chickpea.
      3. Mix everything together and cover the pan for two minutes or until the Spinach is wilted thoroughly.
      4. Open the pan and let the excess Water (if any) evaporate.
      5. Add Salt and the cooked Quail Eggs; saute everything together for a minute and serve hot.
      Notes:
      • Add Salt only at the end or you may add more seeing the amount of Spinach which will reduce considerably.
      • If you are a vegetarian, please avoid Eggs. 
      • I used baby Spinach in this recipe.
      • Quail Eggs are available in most of the stores that sells Asian groceries.


      Make it, enjoy the deliciousness and 
      serve it to your family with love…

      Shrimp curried in Coconut Milk

      Recipe No: 195
      This is a very easy yet tasty Shrimp Curry. I learned the secret of grinding Shrimp along with the Masala, first from Vahrehvah.com and later found that this is common in Thai cuisine. Well that feature in this curry gives its gravy a delectable taste. Just try for yourself…
      Ingredients                                       Serves 3
      • Shelled and deveined Raw Shrimp…250 grams
      • Vegetable Oil……………………………...2 Tablespoons
      • Tomato chopped………………………...1 big
      • Coriander Leaves………………………..2 Tablespoons
      • Thick Coconut Milk………………..…..1 Cup
      • Vinegar……………………………….…….1/2 Teaspoon
      • Pinch of Sugar
      • Salt to taste
      To grind into a smooth paste
      • Red Chilly Powder………………………1 Teaspoon
      • Coriander Powder…………………..….1 Teaspoon
      • Turmeric Powder……………………....1/2 Teaspoon
      • Shallots sliced…………………………....1/4 Cup
      • Ginger Garlic paste…………………….1 Teaspoon
      • Prawns……………………………………..2 big/ 4 small
      Method of Preparation
      1. Grind all the ingredients given in the ‘to grind’ section into a smooth paste using very little Water and keep aside till ready to be used.
      2. Heat Oil in a pan on medium high heat and saute the ground paste till the Oil oozes out, stirring often.
      3. Add the Tomato and ¼ cup Water and let it cook till the tomatoes are mashed and the Oil is separated.
      4. Add Salt, Sugar, Coriander Leaves, Coconut Milk and ¼ Cup Water; mix well and let it boil on medium high heat.
      5. Once boiled, add the shrimp and let it cook for about 5-8 minutes or till the Shrimp is cooked properly.
      6. Once cooked, mix in the Vinegar and serve it hot with Rice or any flat breads.
      Notes:
      • Sauteing the Masala till Oil oozes out is very important as it removes the raw taste and makes the gravy delicious.
      • Don't avoid the Prawns while grinding the Masala as it makes the gravy very delicious.
      • Shrimp have a short cooking time. Cooking them long will make it rubbery/ hard.
      • I found that whole head-on Raw Shrimp gives a very soft texture when cooked than the head off or peeled Shrimp. So I prefer to clean the Shrimp just before cooking. Freezing whole Raw Shrimp will protect its texture.
      • If you are squeezing fresh Coconut, do mix 1st and 2nd Milk and avoid using extra Water.


      Make it, enjoy the deliciousness and 
      serve it to your family with love…

      Sunday, February 13, 2011

      Chembu Asthram (Taro/ Colacasia in ground Coconut Gravy)

      Recipe No: 194
      This is one of the best combination for Kanji/ Conjee/ Rice Porridge/ Rice Gruel and happened to be my Paternal Grandfathers favorite dish for dinner. As he used to say...
      Rathriyil kanjiyum asthravum kudichittu kidannal enthoru sughama’ (It feels so good to sleep in the night after having Kanji and Asthram)
      And so this used to be one of the common dinner item for us whenever he came over. And as he went for his eternal rest, my Mother reduced making this as most of us are in favor of eating Chappathis for dinner… but still, now and then it makes its appearance on the dinner table especially when I am there, as I am really crazy about Taro. Even though this can be made with most of the tubers this is my favorite…
      Ingredients                                  Serves 4
      • Taro root/ Chembu………………..6 small (quartered; cut into big pieces)
      • Salt to taste
      To grind into a smooth paste
      • Whole Dry Red Chilly…………….3-4
      • Shallots…………………………….….2
      • Garlic……………………………….….1 clove
      • Grated Coconut…………………....1/3 Cup
      • Cumin Powder………………….….1/4 Teaspoon (substitute with Cumin seeds also)
      • Turmeric Powder……………….…1/2 Teaspoon
      For tempering
      • Coconut Oil………………………....1 Tablespoon
      • Mustard Seeds……………………..1/2 Teaspoon
      • Shallot sliced………………………..1 big
      • Curry Leaves………………………..1 Sprig
      Method of Preparation
      1. Add the Dry Red Chilly to a blender and pulse it two times. Stop and remove the big  Chilly skins and keep it aside for tempering.
      2. Add all the other ingredients to grind into the blender together with the rest of the dry Red Chilly and grind into a smooth paste. Keep it aside till ready to be used.
      3. Wash the cubed Taro root till the Water runs clear. Add 1 cup Water and boil it on high heat. Once boiled, reduce the heat and let it cook.
      4. Once the pieces are almost cooked, add Salt and let it boil once more.
      5. Add the ground paste and mix well. Let it boil for another minute.
      6. With a spoon or the spatula, mash two or three taro pieces. This will make the curry thick.
      7. Switch off the heat and keep it covered.
      8. In another pan, heat Oil on medium high heat and splutter the Mustard Seeds.
      9. Add the Dry Red Chilly skins that we have reserved while grinding, followed by Shallots and Curry Leaves. Saute till brown.
      10. Add this tempering on top of the prepared Asthram and close the vessel.
      11. Let it sit for 30 minutes before stirring and serving warm with Kanji.
      Notes:
      • Use Water at room temperature (not hot/ warm) while cooking Taro to ensure even cooking.
      • There are chances for the Water to boil over while cooking Taro. So once boiled, keep the lid half open through the rest of the cooking.
      • To test whether the Taro roots are cooked, just pierce it with a toothpick or a pointed knife. If it goes through, it is cooked.
      • Taro root won’t take too long to cook. After boiling, 3-5 minutes is enough.
      • Take care not to overcook the Taro root as it loses its texture.
      • Don't make this dish too watery. But take into consideration that since we are mashing some of the pieces, it will thicken as it sits.
      • This can be made with other type of Yams too… like Chena (Elephant Yam), Kaachil etc:


      Make it, enjoy the deliciousness and 
      serve it to your family with love…

      Thursday, February 10, 2011

      Kunjappa Curry (?) (Rice balls in Jaggery sweetened Coconut Milk)

      Recipe No: 193
      I will say that this dish is from two generations back!!! I had neither eaten nor seen this. The story about this dish came from my Mother in Laws second cousin, who called me the day I posted Kozhi Pidi. She had memories of this dish that her Grandmother used to make, and asked me to get more information for my Mother in Law. I was completely mesmerized when she described it and was thrilled to make a dish that I had never eaten, or seen or even heard about.

      Well, this has close resemblance to Teengapal Kozhukkatta/ Alli Pidi/ Maniputtu, and differs from those with its signature aromatics and  the sweetening agent. Above all, the name was quiet intriguing too… as it was way far from what a sweet dish should have... Well, if any of you guys out there know this dish or any other name for this dish , please let me know… I would love to hear more about it…
      Ingredients                                                   Serves 6-8
      For the Rice Balls
      • Rice Flour……………….....1 Cup (Idiyappam/ String Hopper Flour is the best)
      • Salt………………………......1/8 teaspoon
      • Ghee…………………….......1 Teaspoon
      • Boiling Water………….....1 Cup
      For the Sauce
      • Jaggery……………………….2/3 Cup
      • Thin Coconut Milk..........1 Cup (Medium thin)
      • Thick coconut Milk……....1/2 Cup
      • Dry Ginger Powder……...1/8 Teaspoon
      • Roasted Cumin Powder…1/8 Teaspoon
      Method of Preparation
      1. Mix together Rice Flour and Salt and make a soft dough using boiling Water and Ghee.
      2. Make small balls out of the dough. (I made around 60 balls)
      3. Steam the Rice balls for 8-10 minutes or until cooked through. Keep aside till ready to be used.
      4. Melt Jaggery with ½ cup Water and strain it two times (to remove the impurities).
      5. Put the strained Jaggery syrup in a pan on medium heat and boil till slightly thick.
      6. Add the steamed Rice balls and boil for about 3 minutes stirring often.
      7. Add the thin Coconut Milk and continue cooking stirring often for around 6-8 minutes. By this time the sauce will be reduced considerably.
      8. Add the thick Coconut Milk and let it start to simmer.
      9. Add Dry Ginger powder and roasted Cumin powder; mix well.
      10. Switch off the heat and let it sit in the same pan for 5 minutes before serving hot or warm.
      Notes:
      • The dough should be as soft as Idiyappam/ String Hopper dough.
      • You can use a pressure cooker to stem the Rice Balls. Place the balls in an Idli mold; and steam it without the weight.


      Make it, enjoy the deliciousness and 
      serve it to your family with love…

      Spring Onion Thoran (Stir Fried Green Onion/ Scallions with Coconut)

      Recipe No: 192
      I had this good friend who once casually mentioned that they are having Spring Onion Thoran for lunch. I thought it was a clever idea and gave it a try. I was completely shocked when it reminded me of my Mother's Ulli/ Shallots thoran, which I used to eat a lot. But considering the effort to peel all those Shallots and its cost here in US, Green/ Spring Onions are a good and clever alternative when your taste buds just want to reacquaint with that old lovely taste.
      Ingredients                                  Serves 2
      • Chopped Spring Onions……….2 Cups
      • Oil……………………………..……..1 Tablespoon
      • Mustard Seeds……………………1/4 teaspoon
      • Shallots sliced…………………….2
      • Green Chilly chopped…..……..1
      • Grated Coconut………………….2-3 Tablespoons
      • Turmeric Powder………………..1/4 Teaspoon
      • Salt as needed
      Method of Preparation
      1. Heat Oil in a pan on medium high heat and splutter the Mustard seeds.
      2. Add Shallots and saute till golden brown.
      3. Add chopped Spring Onions and Green Chilly; saute for a minute.
      4. Mix together grated Coconut, Turmeric Powder and Salt; place this in the middle of the sauteed Spring Onion mixture (make some space by moving the Spring Onions to the sides).
      5. Cover the Coconut with the Spring Onion from the sides; close the pan; reduce the heat to low and let it cook for around 3 minutes.
      6. Open the pan, mix thoroughly and let extra Water (if any) evaporate on high heat.
      7. Serve hot with Rice.
      Notes:
      • If you are washing the Spring Onions just before using, take care to wipe them dry before chopping.
      • Don't use a chopper/ food processor to chop the Spring Onions.
      • Make sure to use both green and white parts of Spring Onions.


      Make it, enjoy the deliciousness and 
      serve it to your family with love…

      Tuesday, February 8, 2011

      Pork Dumplings with Dipping sauce

      Recipe No: 191
      Dumplings are one of our favorites from Chinese restaurants… This recipe is inspired from the cook book ‘Stir Fry’ by Linda Doeser. I made Wontons many times before using store bought Wonton skins, but the homemade wrapper of this dumpling took me by surprise, that they were soft and much tastier than the Wonton skins, which are usually very thin. Anyway the dish was a huge success at ours and was proved by the  silence with occasional 'hmm's when I put this platter on the dining table...
      Ingredients                                           Makes 20-22
      For the Wrapper
      • All Purpose Flour/ Maida…1 Cup
      • Salt…………………………….….1/4 Teaspoon
      • Water…………………………….1/2-2/3 Cup
      For the Filling
      • Minced Raw Pork…………..150 grams or 1 ¾ Cup
      • Cabbage……………………..…120 Grams Blanched (Put in boiling Water for 2 minutes; drain the Water; dry them on a kitchen towel; chop into small pieces; drizzle ½ teaspoon of Sesame oil and mix. 120 grams will yield 1 heaping cup of blanched and chopped cabbage)
      • Green Onion chopped……...2
      • Ginger chopped fine………..1 teaspoon
      • Salt……………………..…………3/4 teaspoon
      • Soy Sauce……………………….1 Tablespoon
      • Brown Sugar…………………..1/2 Teaspoon
      • Rice Wine………………...…….1/2 Teaspoon (Can substitute with any dry Wine; If you don’t have, just avoid)
      • Pepper powder…………..……1/2 Teaspoon
      To cook the Dumplings
      • Oil…………………………….…..1 Tablespoon
      • Chicken Stock…………..…….1 Cup
      To make the dipping sauce
      • Soy Sauce………………………2 Tablespoons
      • Chilly Garlic Sauce………….1 Tablespoon
      • Vegetable Oil……………….…1 Tablespoon
      • Water……………………………1/4 Cup
      • Brown Sugar……………..…..1/2 Teaspoon
      • Chopped spring Onion…….1 Teaspoon
      Method of Preparation
      To make the Wrapper
      1. Mix Flour and Salt well and make a smooth dough using Water. The dough should be soft yet manageable.
      2. Knead it for 5 minutes. By this time the dough will be soft and the surface will be really smooth.
      3. Cover with a lightly damp cloth and keep aside for 30 minutes.
      To make the Filling
      1. Mix all the ingredients to make the filling and keep aside till ready to be used.
      To make the Dumplings
      1. Divide the rested dough into 20-22 equal sized balls.
      2. Roll out these into 3 inch circles. Use Flour if it is sticking.
      3. Place a tablespoon of filling in the middle of the rolled out dough and fold one half over the other. Take care to remove the air bubbles that may be trapped inside.
      4. Once the edges are stuck together make pleats with the dough on the outer edge of the dumpling.
      5. Place this on a lightly floured plate and repeat this process with all the other portions.
      To cook the Dumplings
      1. Heat Oil in a pan on medium high heat and place the dumplings with the broad side touching the pan.
      2. Fry the dumplings for about two minutes or till the broad side is brown in color.
      3. Pour the Chicken stock into the pan; close it; reduce the heat to medium and let it finish cooking with the steam from the stock for around 8 minutes.
      4. If there is a lot of stock left, open the pan and let the excess liquid evaporate.
      5. Off the heat and serve the dumplings with the dipping sauce. Pour the thick stock left in the pan (if any) over the dumplings while serving.
      To make the Dipping Sauce
      1. Mix all the ingredients except the Spring Onions to make the sauce and heat in the microwave or on the stove top till the sugar is dissolved thoroughly. 
      2. Mix in the Spring Onions and serve with Dumplings.
      Notes:
      • Blanching the Cabbage leaves will get rid of the excess Water in them.Coating chopped Cabbage with Sesame Oil will prevent the mix from becoming watery.
      • I found that it is easy to form Wontons if the rolled out skins rest for a while. So I’ll prefer to roll all of them and then start to form Dumplings with the first one that is rolled. As the skins are a bit sticky don’t place one on top of another.
      • Do shake the pan often while frying the dumplings to avoid sticking to the bottom. In case it sticks, help it out with a spoon while transferring to the serving plate.
      • Chilly Garlic Sauce is available in most of the Indian stores.
      • I used Kikkoman Soy Sauce in this recipe.


      Make it, enjoy the deliciousness and 
      serve it to your family with love…

      Monday, February 7, 2011

      Aval Vilayichathu (Jaggery candied Poha/ Rice Flakes)

      Recipe No: 190
      I should say, it was very unfortunate for me that I was not able to enjoy a lot of 'Grandmother cooking' that most of the people cherish. But I vaguely remember the taste of my maternal Grandmothers Aval Vilayichathu, which she used to make often. This is my take on that classic snack which will stay good in an airtight container for sometime in your pantry.
      Ingredients                                          Serves 8
      • Aval/ Poha………...........2 heaping cups (Brown variety preferred)
      • Grated Coconut………….1 ¾ cup
      • Jaggery……………………..1 ½ Cups (cut into small pieces; dark brown Kerala style preferred)
      • Ghee………………………...1 Tablespoon
      • Cashew Nut Pieces…....3 Tablespoons
      • Raisins…………………....1 Tablespoon
      • Channa Dal……………...1 Tablespoon (Optional)
      • Cardamom……………….8-10 (Crush thoroughly)
      • Dry Ginger Powder…….1/4 Teaspoon
      Method of Preparation
      1. Melt Jaggery with half cup of Water on medium high heat and strain it two times to get rid of all the bits n pieces that may present in it. Keep it aside till ready to be used.
      2. Heat Ghee in a pan on medium heat and fry Channa Dal and Cashew Nuts till they start to brown along the edges.
      3. Add Raisins and fry till it plumps up. Remove these from the Ghee and keep it aside till ready to be used.
      4. To the same pan, add the melted and strained Jaggery and on high heat let it boil and reach a one thread consistency, stirring often.
      5. Add the grated Coconut; mix well and let it attain a one thread consistency, stirring often. (The Water from the Coconut will loosen the Jaggery a bit)
      6. Once the consistency is reached, switch off the heat and add Aval, fried Nuts and Raisins, Cardamom Powder and Dry Ginger Powder.
      7. Mix well and let it cool down before serving with Banana.
      8. Keep the leftovers in an airtight container and it will stay good for a long time.
      Notes:
      • It’s better to use brown Aval/Poha and dark blackish brown Kerala style Jaggery for better taste.
      • Melted Jaggery, when pressed between your thumb and index finger should form one thread, for a one thread consistency.
      • You shouldn't use the entire amount of Dry Ginger powder mentioned in the recipe if you are using freshly powdered Dry Ginger.
      • It is very important to let all the Water evaporate or it will go rancid fast.


      Make it, enjoy the deliciousness and 
      serve it to your family with love…